
React localization with react-intl
With Translized, you can easily localize your React applications. In this tutorial, we will seamlessly combine Translized with react-intl.
Lets start
First lets spin our React project. We will use create-react-app but feel free to use any other approach to create new React app (you might want to be faster with esbuild 🤓). Create a folder where you want to have new app, ls into it and write
npx create-react-app .
After its done, since CRA comes with some default file structure, lets remove everything inside src directory except index.js and App.js files. Also be sure to remove all unused imports inside them.
Simple components and page
Lets create some really simple components that will show our translations that we are going to create later on. Inside src create folder named components where we will put our simple components.
First one should be Heading.js:
// Heading.jsconst Heading = ({ title }) => {return <h1 style={{ padding: 20 }}>{title}</h1>;};export default Heading;
after that we have Description.js:
// Description.jsconst Description = ({ text }) => {return <p style={{ padding: 20 }}>{text}</p>;};export default Description;
Don't mind them being this simple, focus more on key concepts that you can implement inside your bigger and more complex projects.
Last component will be our LanguageSelect.js component, which will handle localization changes inside application:
// LanguageSelect.jsconst LanguageSelect = ({ selectedLocale, onChange }) => {const handleOnChange = ({ target }) => {onChange(target.value);};return (<div><label htmlFor="language">Language</label><select name="language" id="language" value={selectedLocale} onChange={handleOnChange}><option value="en">English</option></select></div>);};export default LanguageSelect;
As you can see, it is receiving selectedLocale and onChange props which are responsible to show users selected locale and to change one respectively. For now we will only have English as language to select, more will come shortly.
You can also consider putting those inside some global context of yours, for more readable code.
We also need a page, so lets create folder inside src called pages and inside file name Home.js.
Home page will be simple page rendering our new components:
// Home.jsimport Heading from '../components/Heading';import Description from '../components/Description';const Home = () => {return (<div><Heading title="Welcome to Translized" /><Description text="Just some random page description" /></div>);};export default Home;
Finally lets render our page inside App.js in root directory:
// App.jsimport { useState, Suspense, lazy } from 'react';// Componentsconst LanguageSelect = lazy(() => import('./components/LanguageSelect'));// Pagesconst Home = lazy(() => import('./page/Home'));export default function App() {const [selectedLocale, setSelectedLocale] = useState('en');const handleLanguageChange = (newLocale) => {setSelectedLocale(newLocale);};return (<Suspense fallback="Loading..."><LanguageSelect selectedLocale={selectedLocale} onChange={handleLanguageChange} /><Home /></Suspense>);}
As you can see App.js will be responsible to store and save user selected locale.
Connecting with Translized
Ok, now that we have our really simple app/page, lets connect with Translized. First login on your Translized account and create your first project with default language of your choice (we will go with English). You will be redirected to your new project and if you click on Terms tab you should see this:
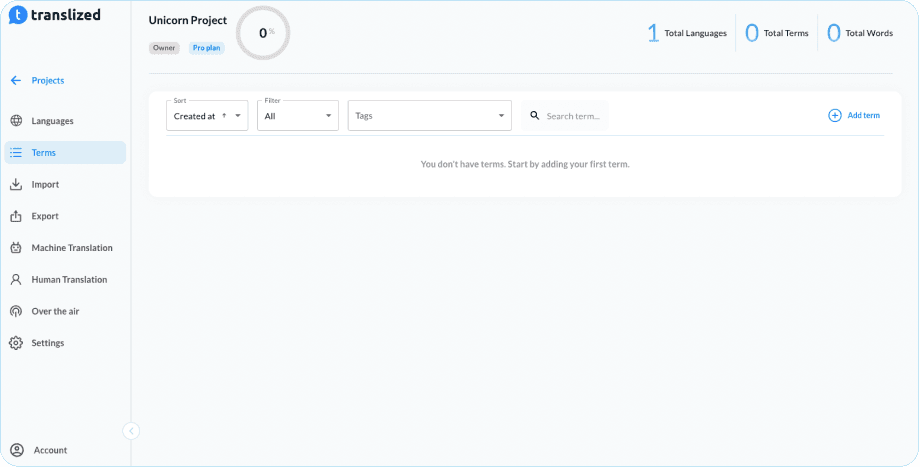
Lets click on Add term button and add two terms:
HOME_PAGE.HEADING with context: This will be main heading for our home page
HOME_PAGE.DESCRIPTION with context: Home page description that will tell users what can they expect from our software
Now, lets translate our newly created terms. On term row, you can see thunderbolt icon which is our Quick translate feature. Open quick translate pop-up and translate both of our new terms. We translated them as:
HOME_PAGE.HEADING: Welcome to Translized
HOME_PAGE.DESCRIPTION: Grasp automation and deliver faster with simple, easy to use and developer friendly localization platform.
When you are done, now it comes fun part.
Lets install our CLI. To install Translized CLI our recommended way for system-wide installation is via Brew package manager. Simply run:
brew tap translized/translizedbrew install translized-cli
Ok we installed Translized CLI. Now we just need to run:
translized init
This will ask you series of questions:
Enter API token: You can find your API token inside Translized app > Account > API Access tab
Enter projectId: You can find your projectId inside Translized app > Project > Settings tab
Select File format: This will give us option to chose from our supported file formats. We will go with option 1(json)
Download File path: This is destination inside your project, where and how do you want to download localization files. We will use locale folder inside src directory (./src/locale/[locale_code].json)
Upload File path: Here you need to tell Translized from where you want to upload files to Translized. When you are adding new terms for example. Usually you should pick default language, in our case it is english file (./src/locale/en.json)
Language code of upload file: Here you need to specify your primary language for uploading to Translized. Default is en and we will use default one.
After you are done, .translized.yml file is created in root directory and your project is successfully connected with Translized CLI.
Include internationalization inside React
To include and manage translations inside our React app, we will use FormatJs - react-intl package. It is most well-known and popular package to handle all kinds of internationalization inside React apps. We will not cover full guide on how react-intl is working, but even if you are not familiar with it, we are using simple React patterns so far so you should understand what is going on.
Before changing our components, to adopt react-intl, lets create file where we will define our messages. Each message is object with id and defaultMessage. That ID will be used to connect with our Term keys that we created. Default message is just fallback in some terms are not translated on selected language so we will use English as default messages.
Create file messages.js inside src directory like this:
// messages.jsimport { defineMessages } from 'react-intl';const messages = defineMessages({heading: {id: 'HOME_PAGE.HEADING',defaultMessage: 'Welcome to Translized',},description: {id: 'HOME_PAGE.DESCRIPTION',defaultMessage:'Grasp automation and deliver faster with simple, easy to use and developer friendly localization platform.',},});export default messages;
This is our recommended way of handling and storing messages. You can have this
messages.jsfile inside every page or component which need to use localization so you can easier maintain them on one place.
Now, let's make some changes inside Home.js and App.js:
// Home.jsimport { useIntl } from 'react-intl';import messages from '../messages';import Heading from '../components/Heading';import Description from '../components/Description';const Home = () => {const { formatMessage } = useIntl();return (<div><Heading title={formatMessage(messages.heading)} /><Description text={formatMessage(messages.description)} /></div>);};export default Home;
// App.jsimport { useState, Suspense, lazy } from 'react';import { IntlProvider } from 'react-intl';// Localesimport en from './locale/en.json';import es from './locale/es.json';import de from './locale/de.json';// Componentsconst LanguageSelect = lazy(() => import('./components/LanguageSelect'));// Pagesconst Home = lazy(() => import('./page/Home'));const messages = {en,es,de,};export default function App() {const [selectedLocale, setSelectedLocale] = useState('en');const handleLanguageChange = (newLocale) => {setSelectedLocale(newLocale);};return (<IntlProvider messages={messages[selectedLocale]} locale={selectedLocale} defaultLocale="en"><Suspense fallback="Loading..."><LanguageSelect selectedLocale={selectedLocale} onChange={handleLanguageChange} /><Home /></Suspense></IntlProvider>);}
Here we have now <IntlProvider /> which is responsible for providing messages inside react-intl. locale prop is selected locale and messages is json file.
Notice how we have two extra languages Spanish (es) and German (de) that we still don't have, so lets translate them.
If you go to your project on Translized and open Language tab you should see this:
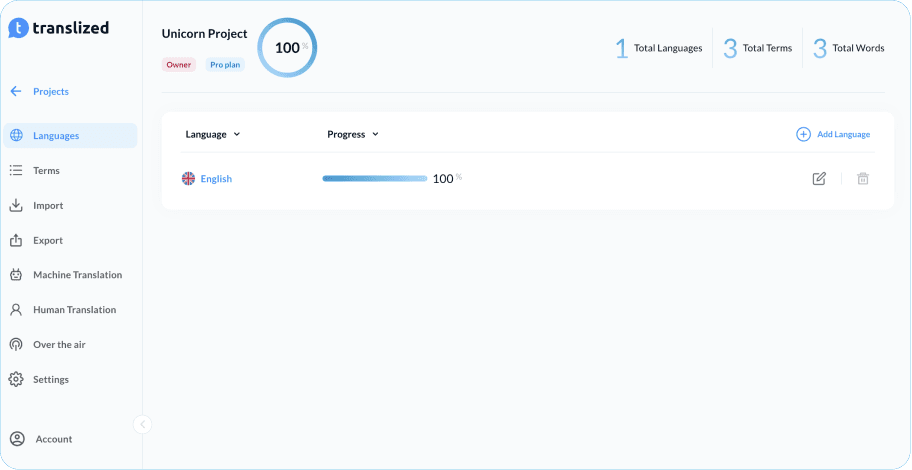
Click on Add language button and add Spanish and German languages.
When you are done, let's go to another fun part.
Click on Machine Translation tab so we can translate our two new languages in one click. Just select English as "from language" and other ones as "target languages".
If you go back to Languages tab you should see that everything is translated:
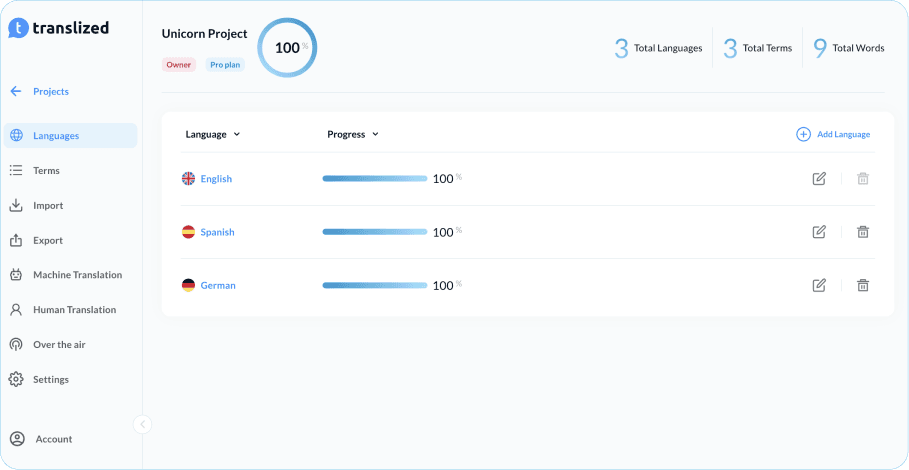
Now go again to your terminal and download latest changes inside our app with translized download command:
translized download
🎉 Voila, we have our new languages fully translated inside our React project. 🎉
Full code that we wrote today can be found on codesandbox.
Final thoughts
Localization is infamous for being hard and complex. It can be, but it doesn't always have to be this way. With the right tools and proper organization, localization inside our projects can be organized, clear, maintainable and expandable. We can deliver our projects faster, better, and with fewer typos making sure our users can enjoy our products even more in their native language.