
SwiftUI Localization for iOS: A Comprehensive Guide
Reach a whole new market of users, by letting them experience your app in their native language with the help of SwiftUI localization.
SwiftUI localization refers to a process of localizing iOS applications while using SwiftUI as a UI framework.
SwiftUI is a framework that Apple released in the summer of 2019. It is a major update to the UIKit, which is the framework for developing iOS apps. The main goal of SwiftUI is to make it easier for developers and designers to create user interfaces.
Also, SwiftUI helps with the localization process because it provides localized strings and icons.
When it comes to localization, the most common mistake is not starting with it early on in development and ending up with a bunch of strings all over the app.
In this tutorial, we will show you how to easily localize your iOS app and how to get it right.
It will also give you some testing tips on how to make iOS localization easier and more efficient, so you can get back to coding or marketing your app!
Create an iOS application
Start by creating a new Single View Application in Xcode.
File ▸ New ▸ Project ▸ App...
💡 Make sure to select SwiftUI as an interface.
Create Localizable.strings file
Before adding a new language let's create a Localizable.strings file in the root folder.
File ▸ New ▸ File, search for .strings extension and name it 'Localizable'.
After clicking on a new Localizable.strings file you should see 'Localize...' button on the right side.
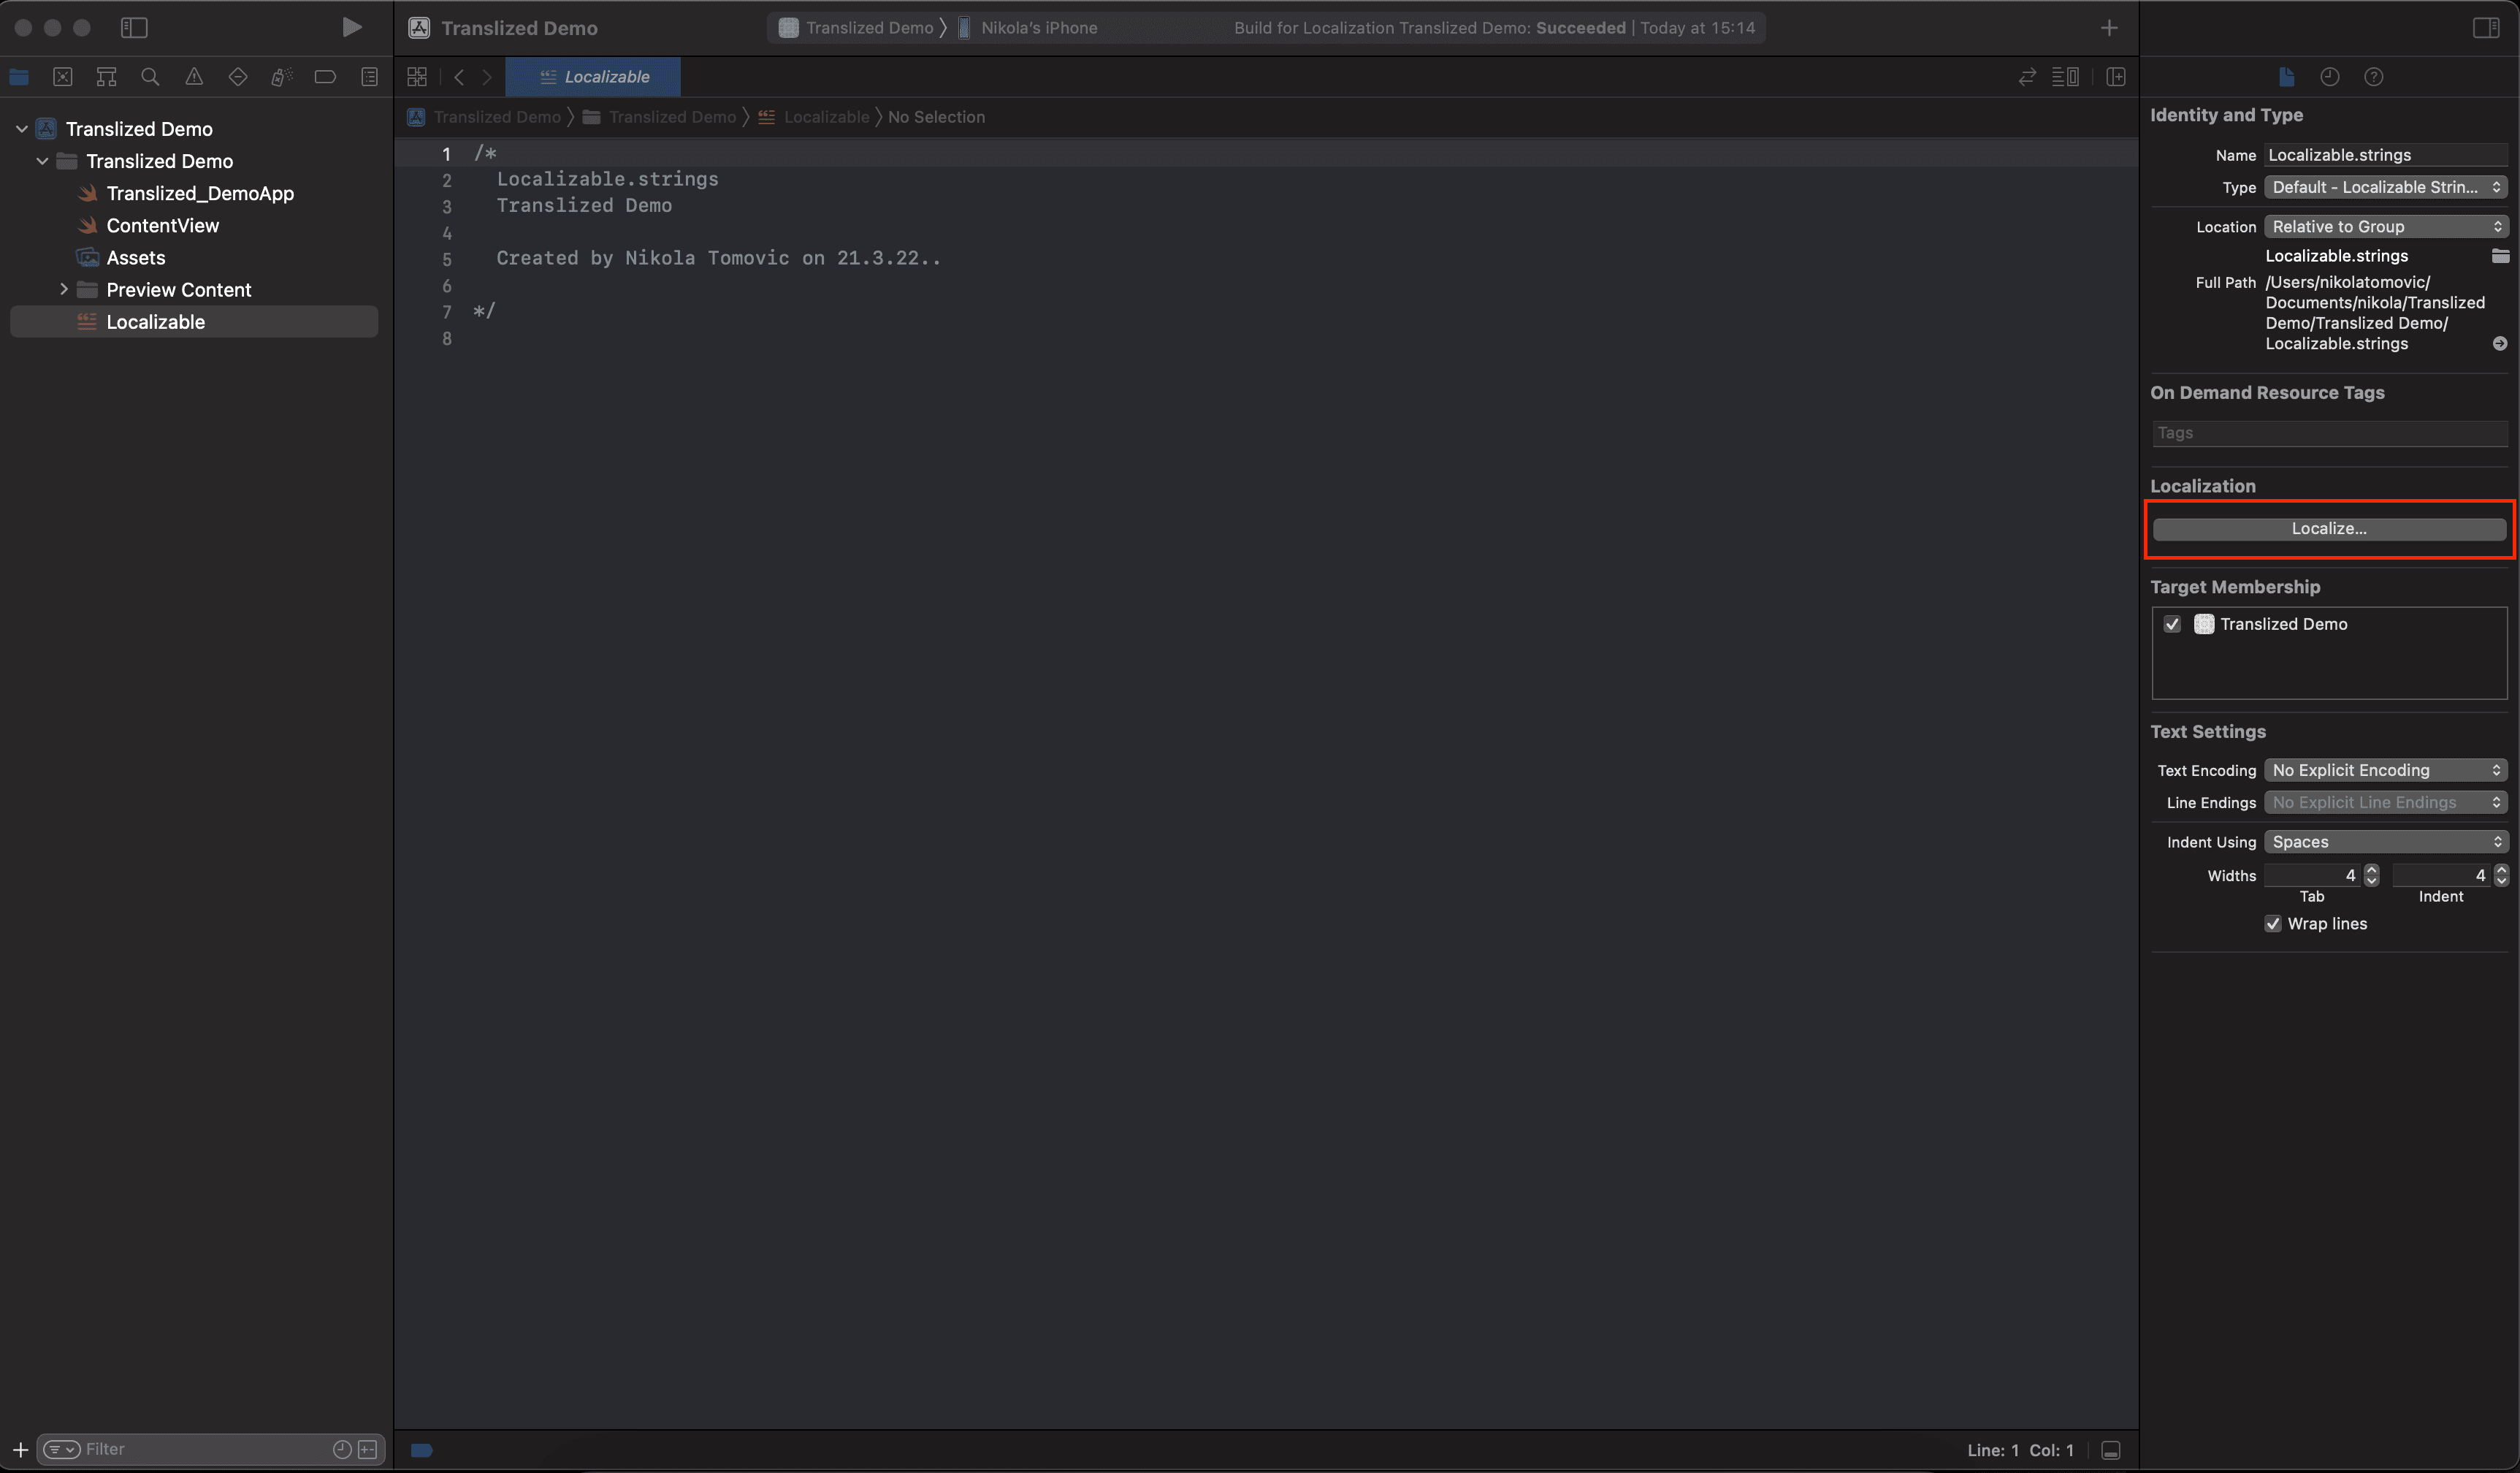
Press 'Localize...' and your base localization will be created! In this case English.
Now we can add a new language.
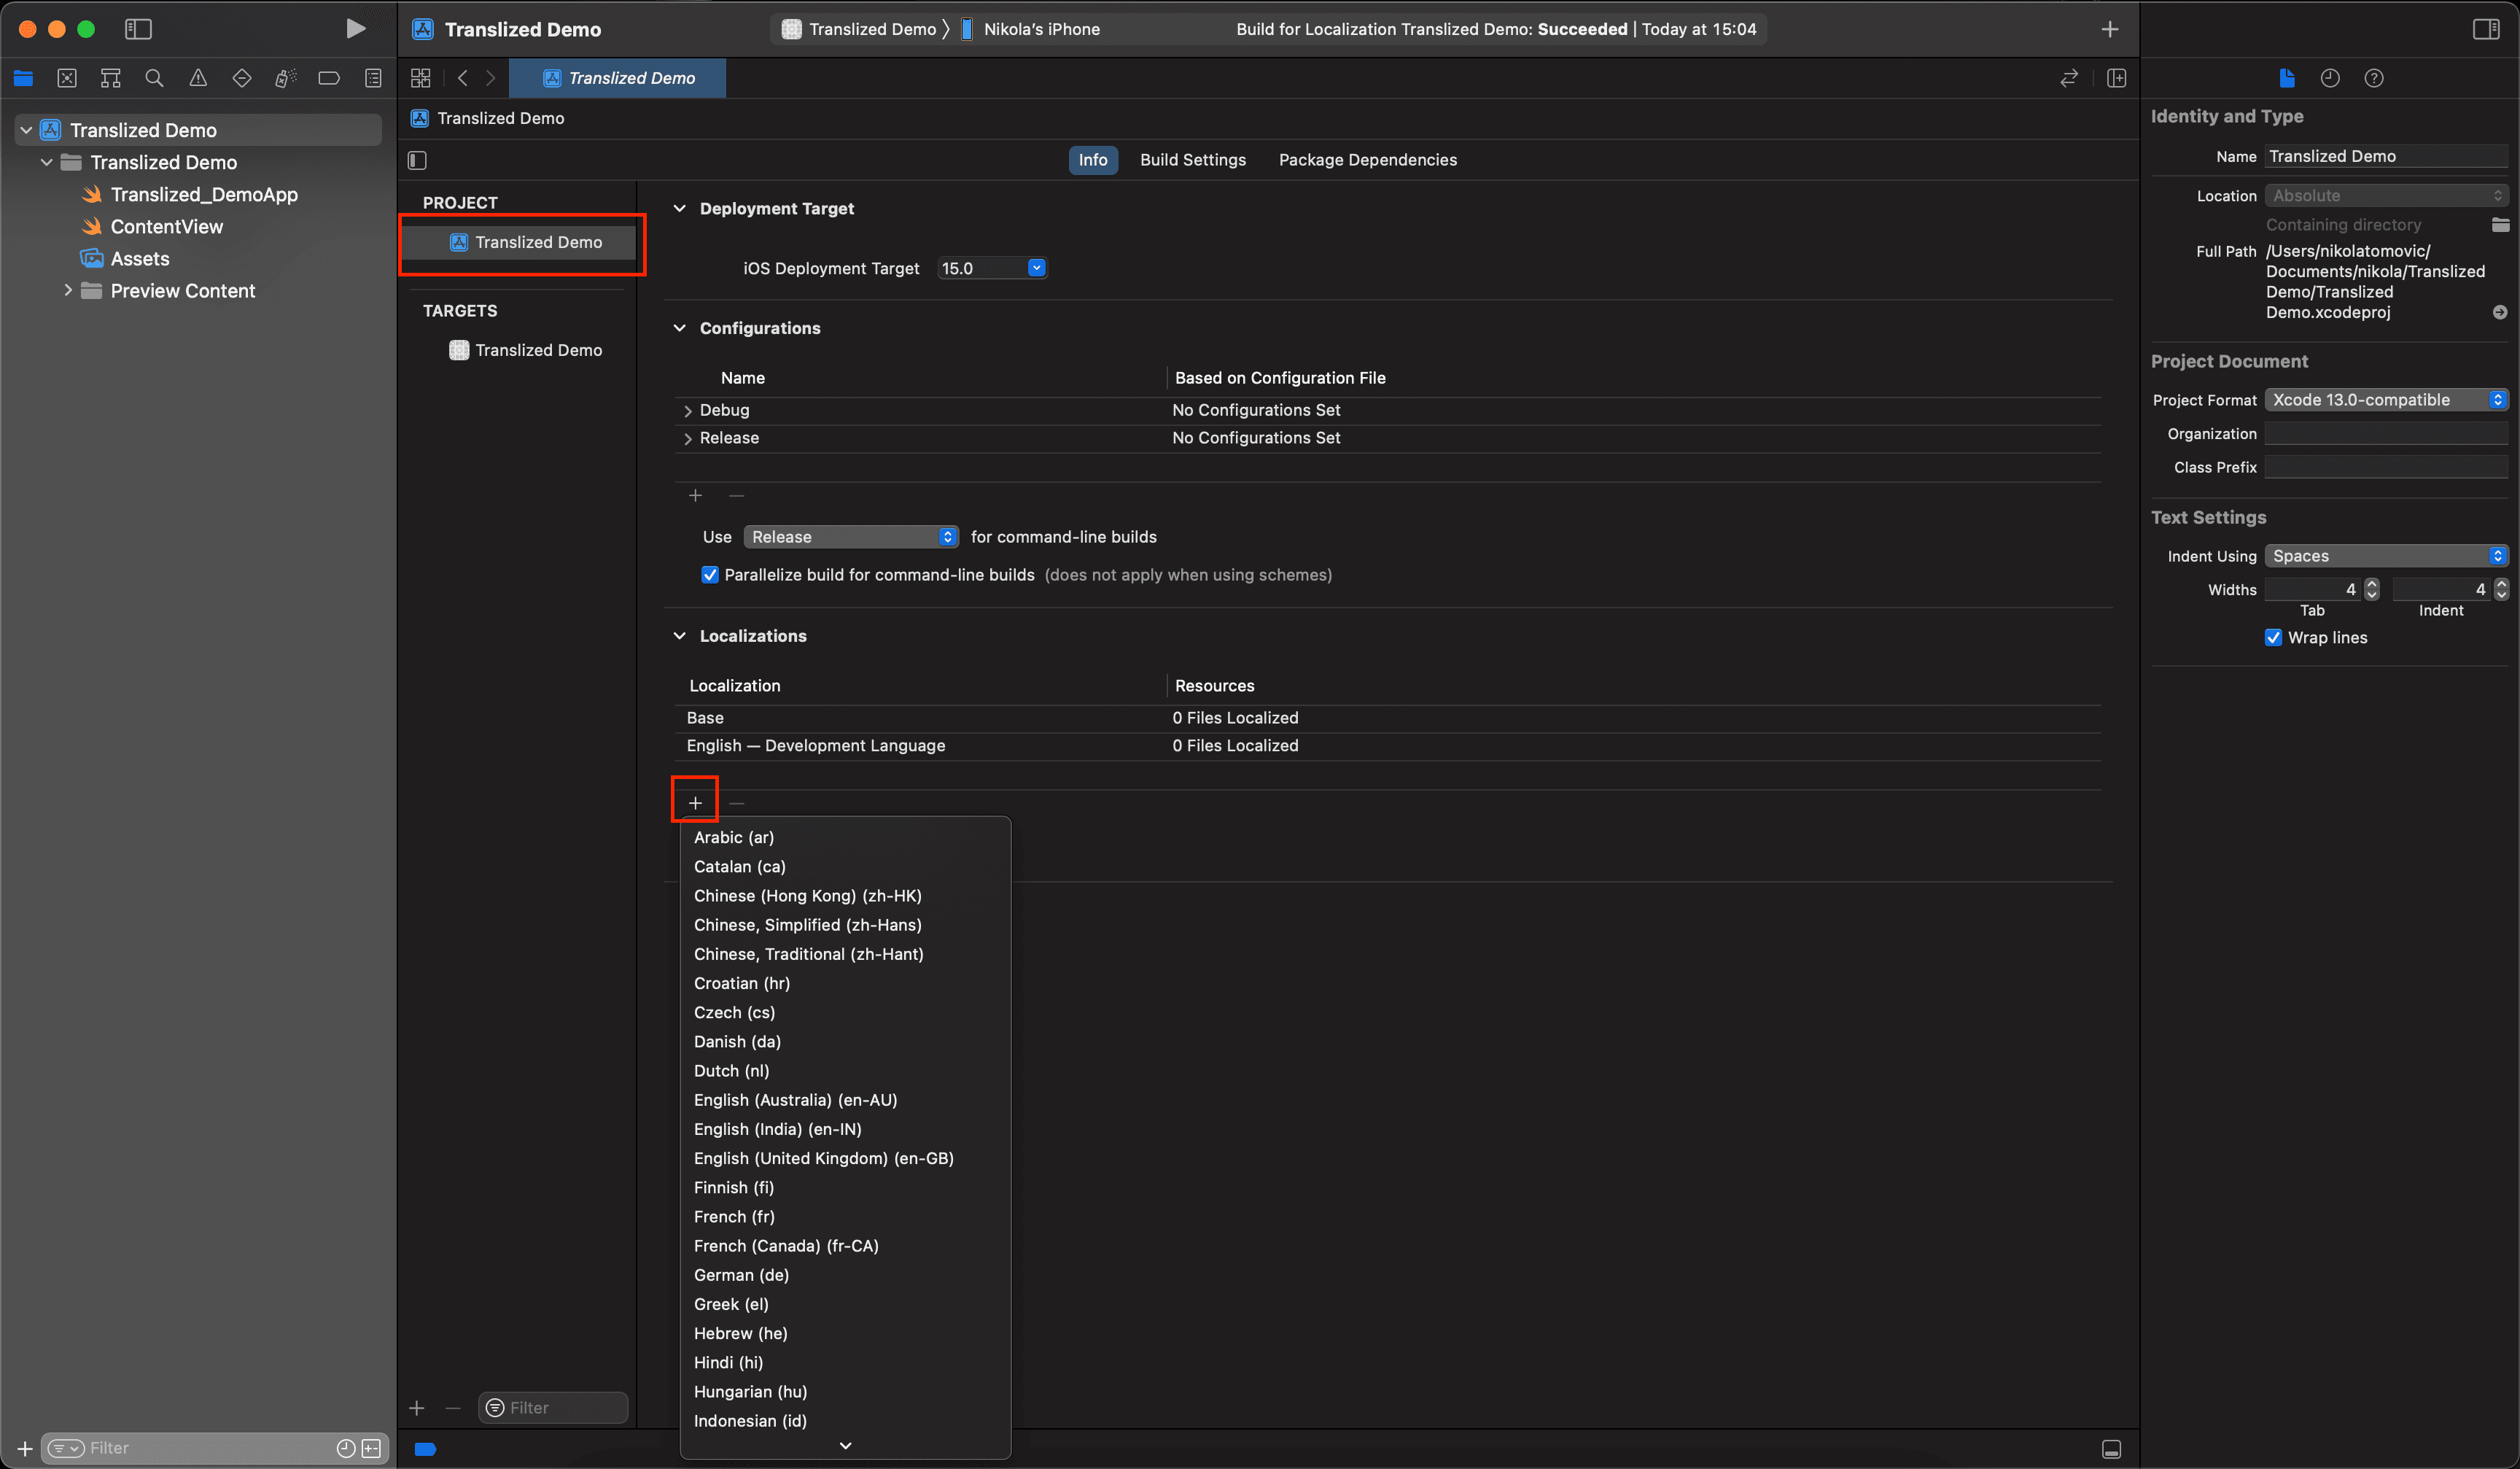
Adding a new language
Now select your project at the top-left side of the project editor, click the + button, and select your desired language. In this case, we'll choose German.
A confirmation dialog will appear. Leave the settings as they are and select Finish.
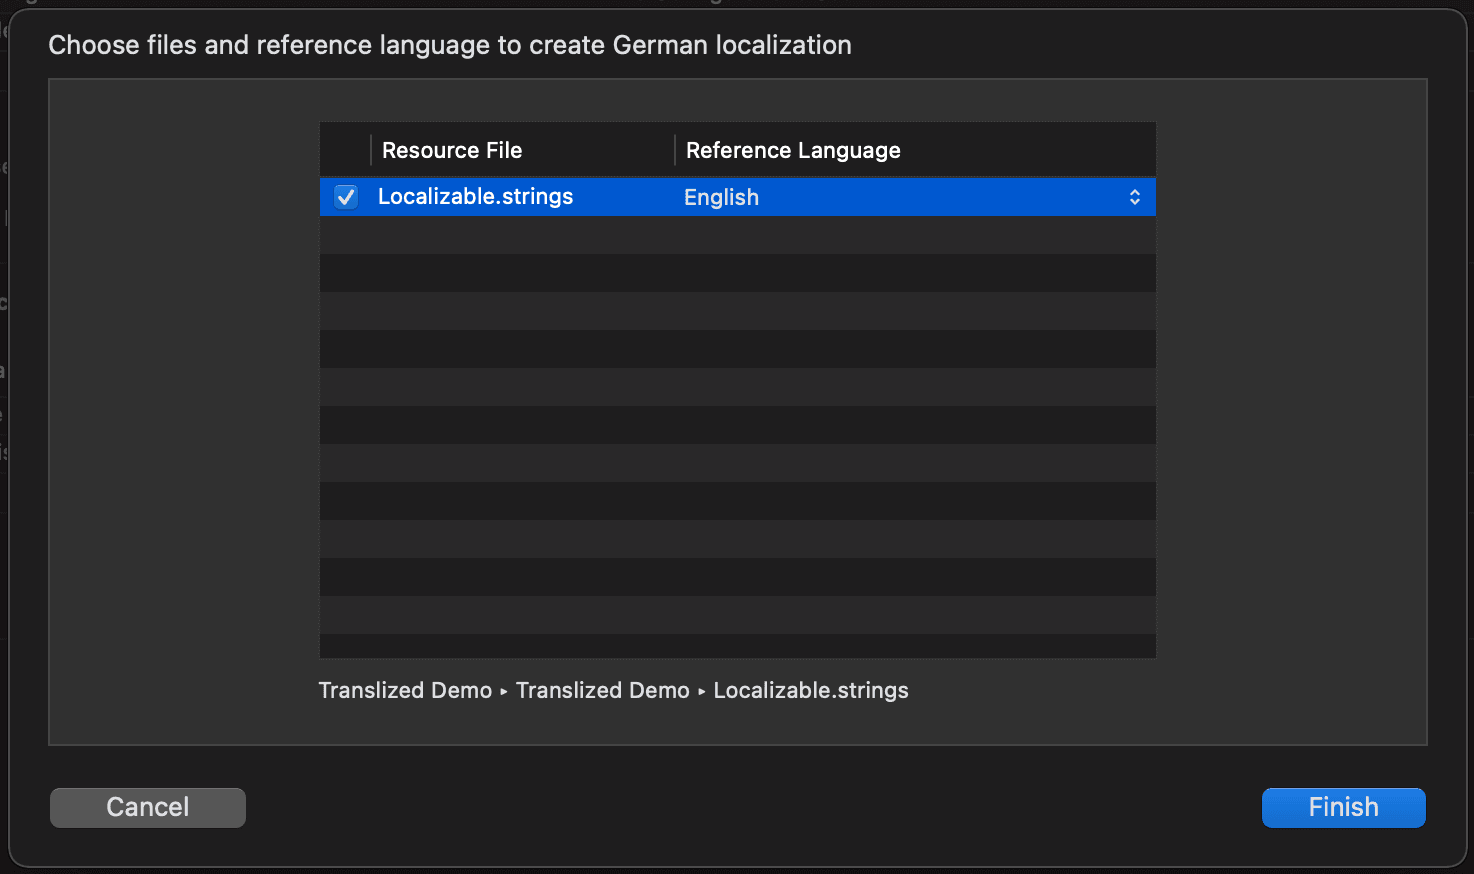
This adds a German file under Localizable.strings.
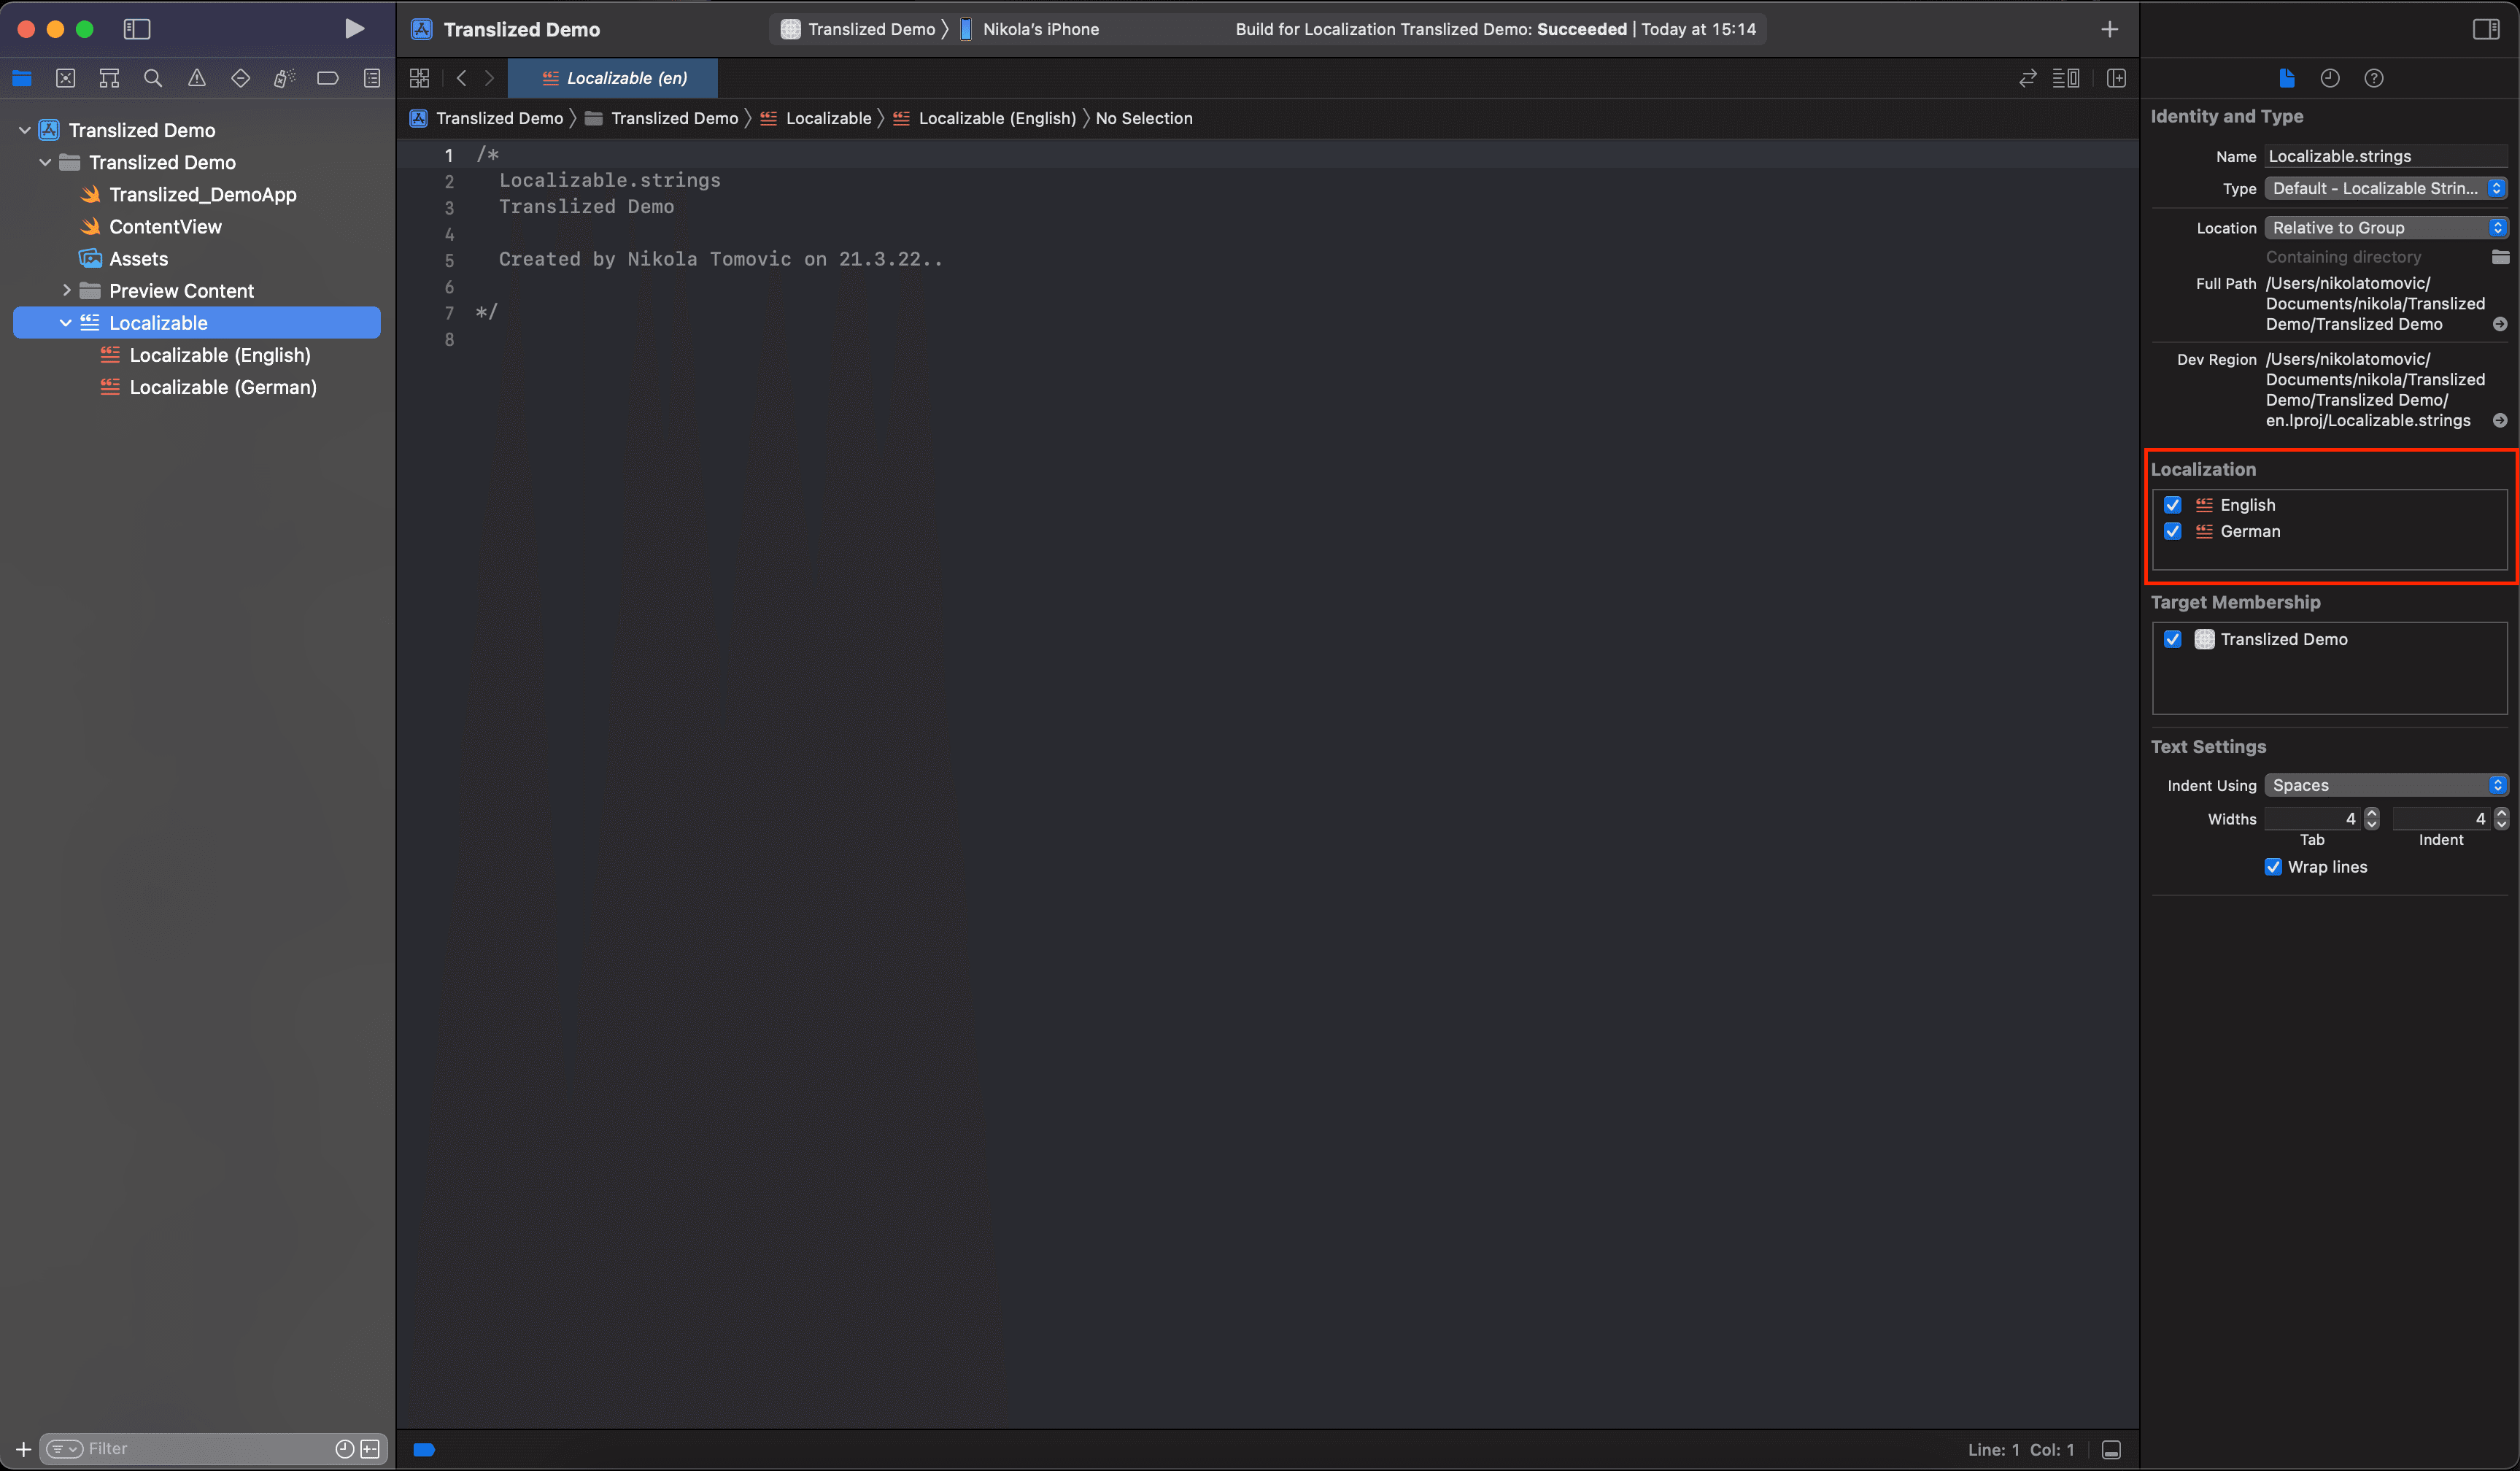
That's it, now we can add some translations!
SwiftUI Localization
First, let's add some translations.
Add this line to the English Localizable.strings file:
"hello" = "Hello, world!";
And this one to the German Localizable.strings file:
"hello" = "Hallo Welt!";
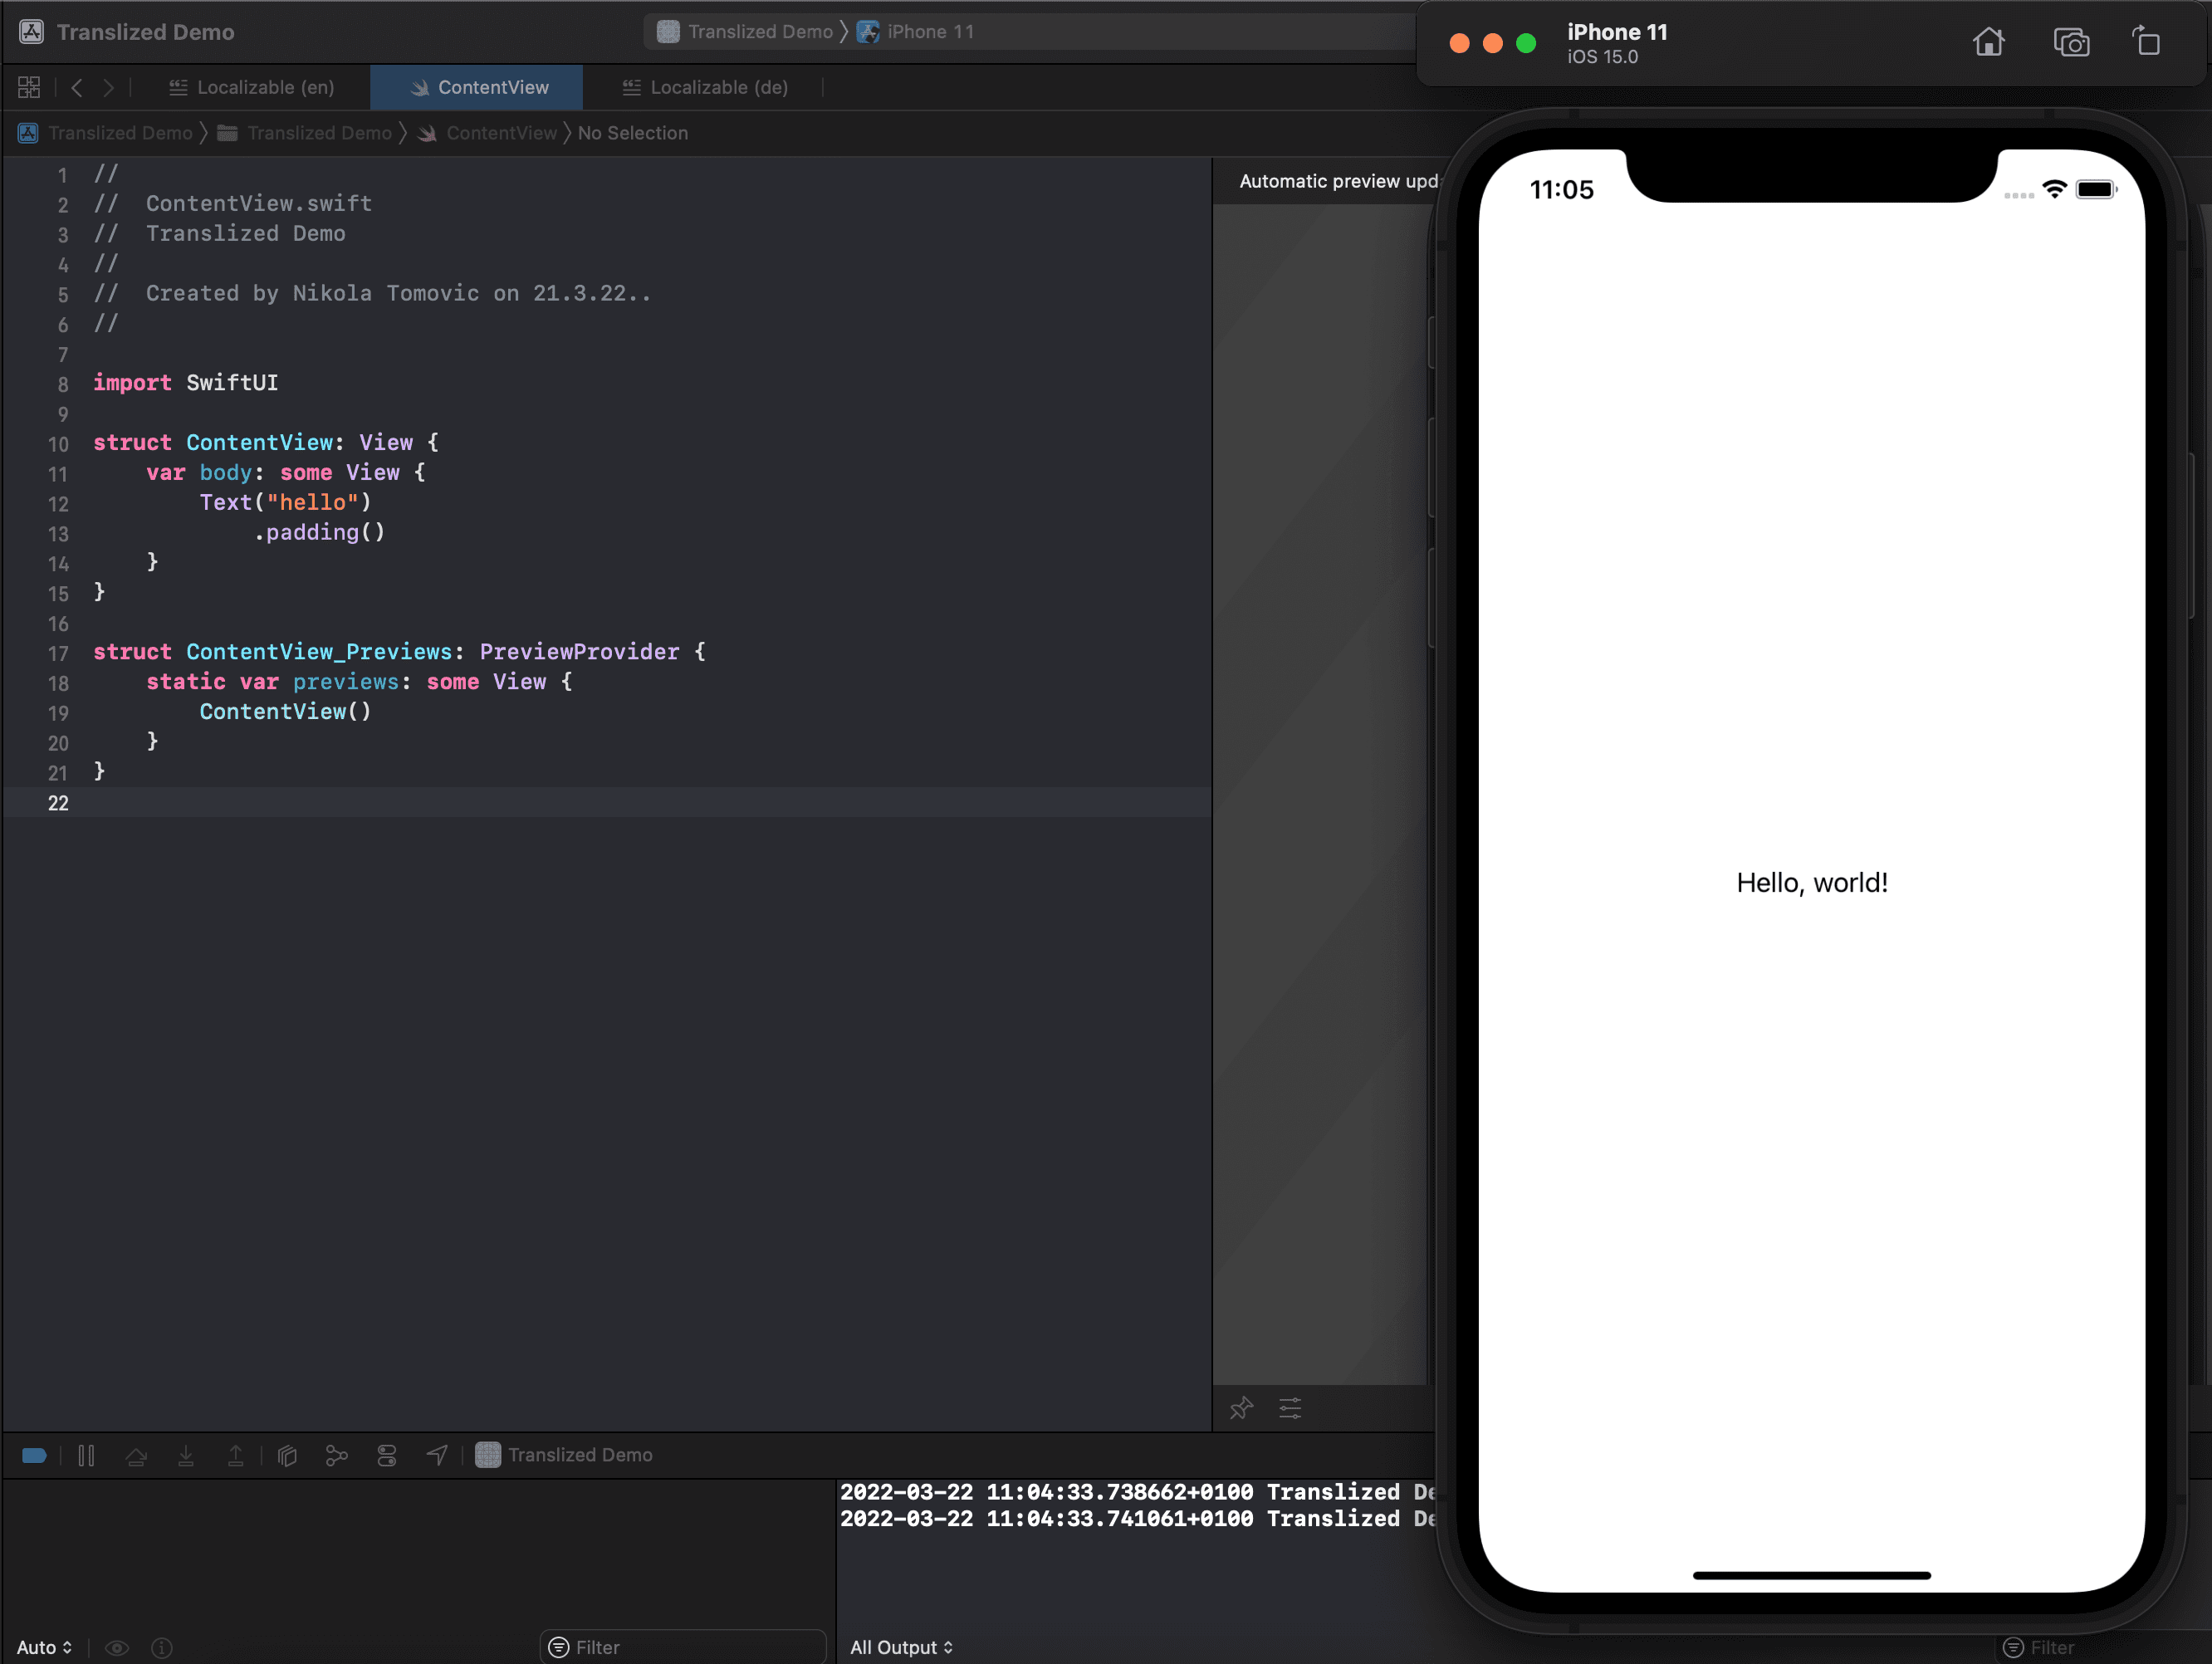
Update ContentView.swift to use the new key.
struct ContentView: View {var body: some View {Text("hello").padding()}}struct ContentView_Previews: PreviewProvider {static var previews: some View {ContentView()}}
Build and run the app. Viola!
You are probably asking yourself, how does this work?
Initializers for several SwiftUI types - such as Text, Toggle, Picker, and others - implicitly look up a localized string when you provide a string literal.
When you use the initializer Text("hello"), SwiftUI creates a LocalizedStringKey for you and uses that to look up the localization of the hello string.
This works because LocalizedStringKey conforms to ExpressibleByStringLiteral.
Testing Localization During Development
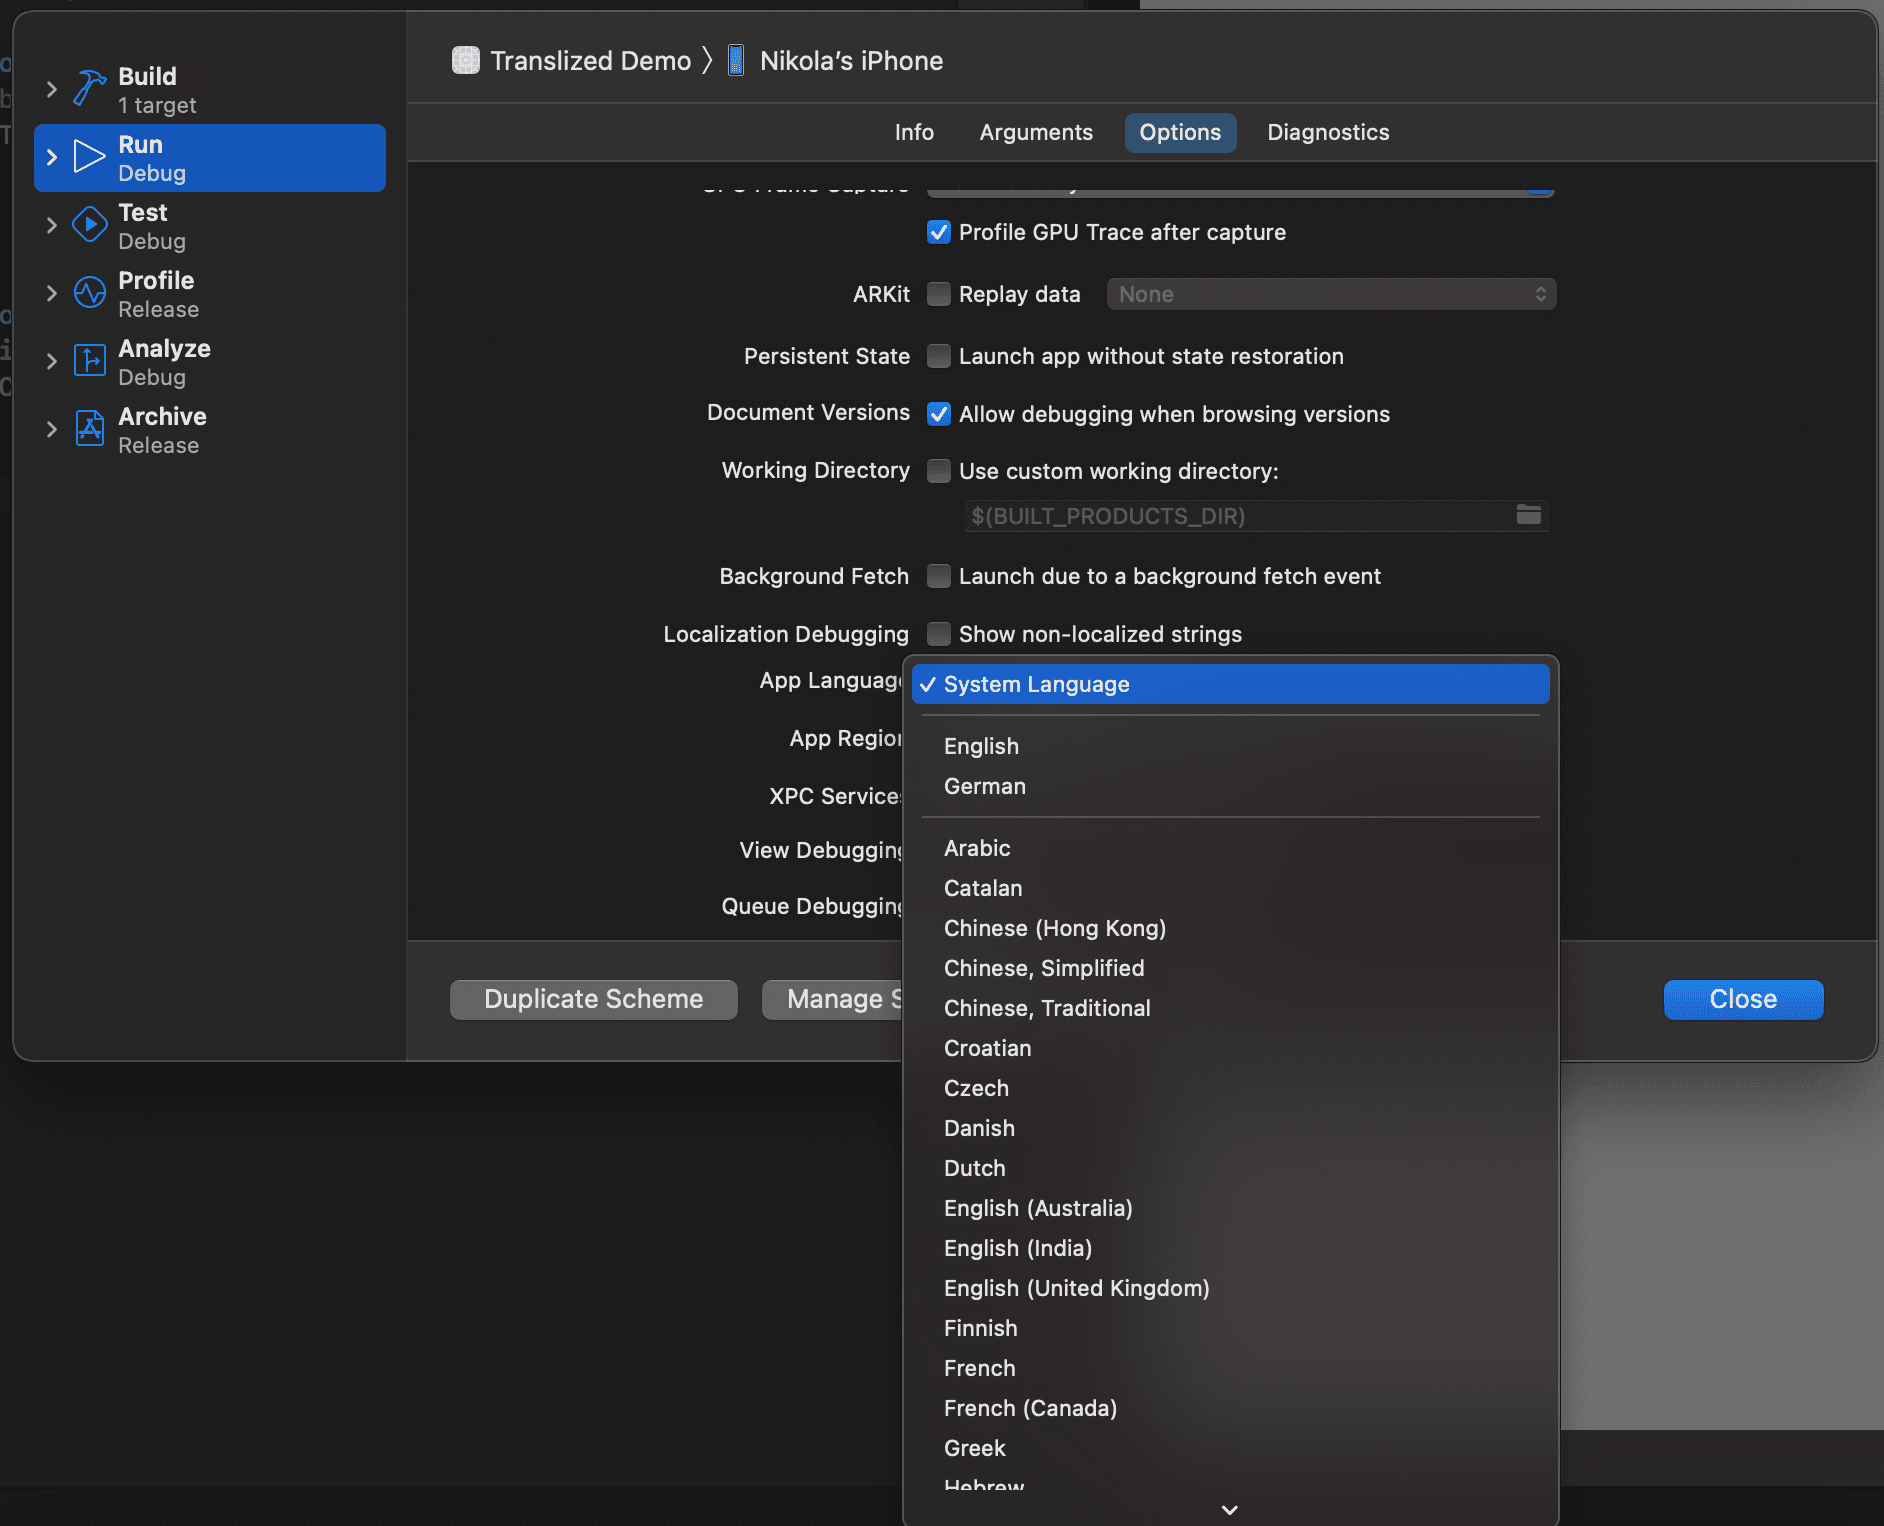
You can test specific languages you have localizations for and regions by selecting options in the scheme editor before launching your app.
Open Product ▸ Scheme ▸ Edit Scheme… ▸ Run ▸ Options. For the setting App Language , select German from the drop-down.
Build and run again.
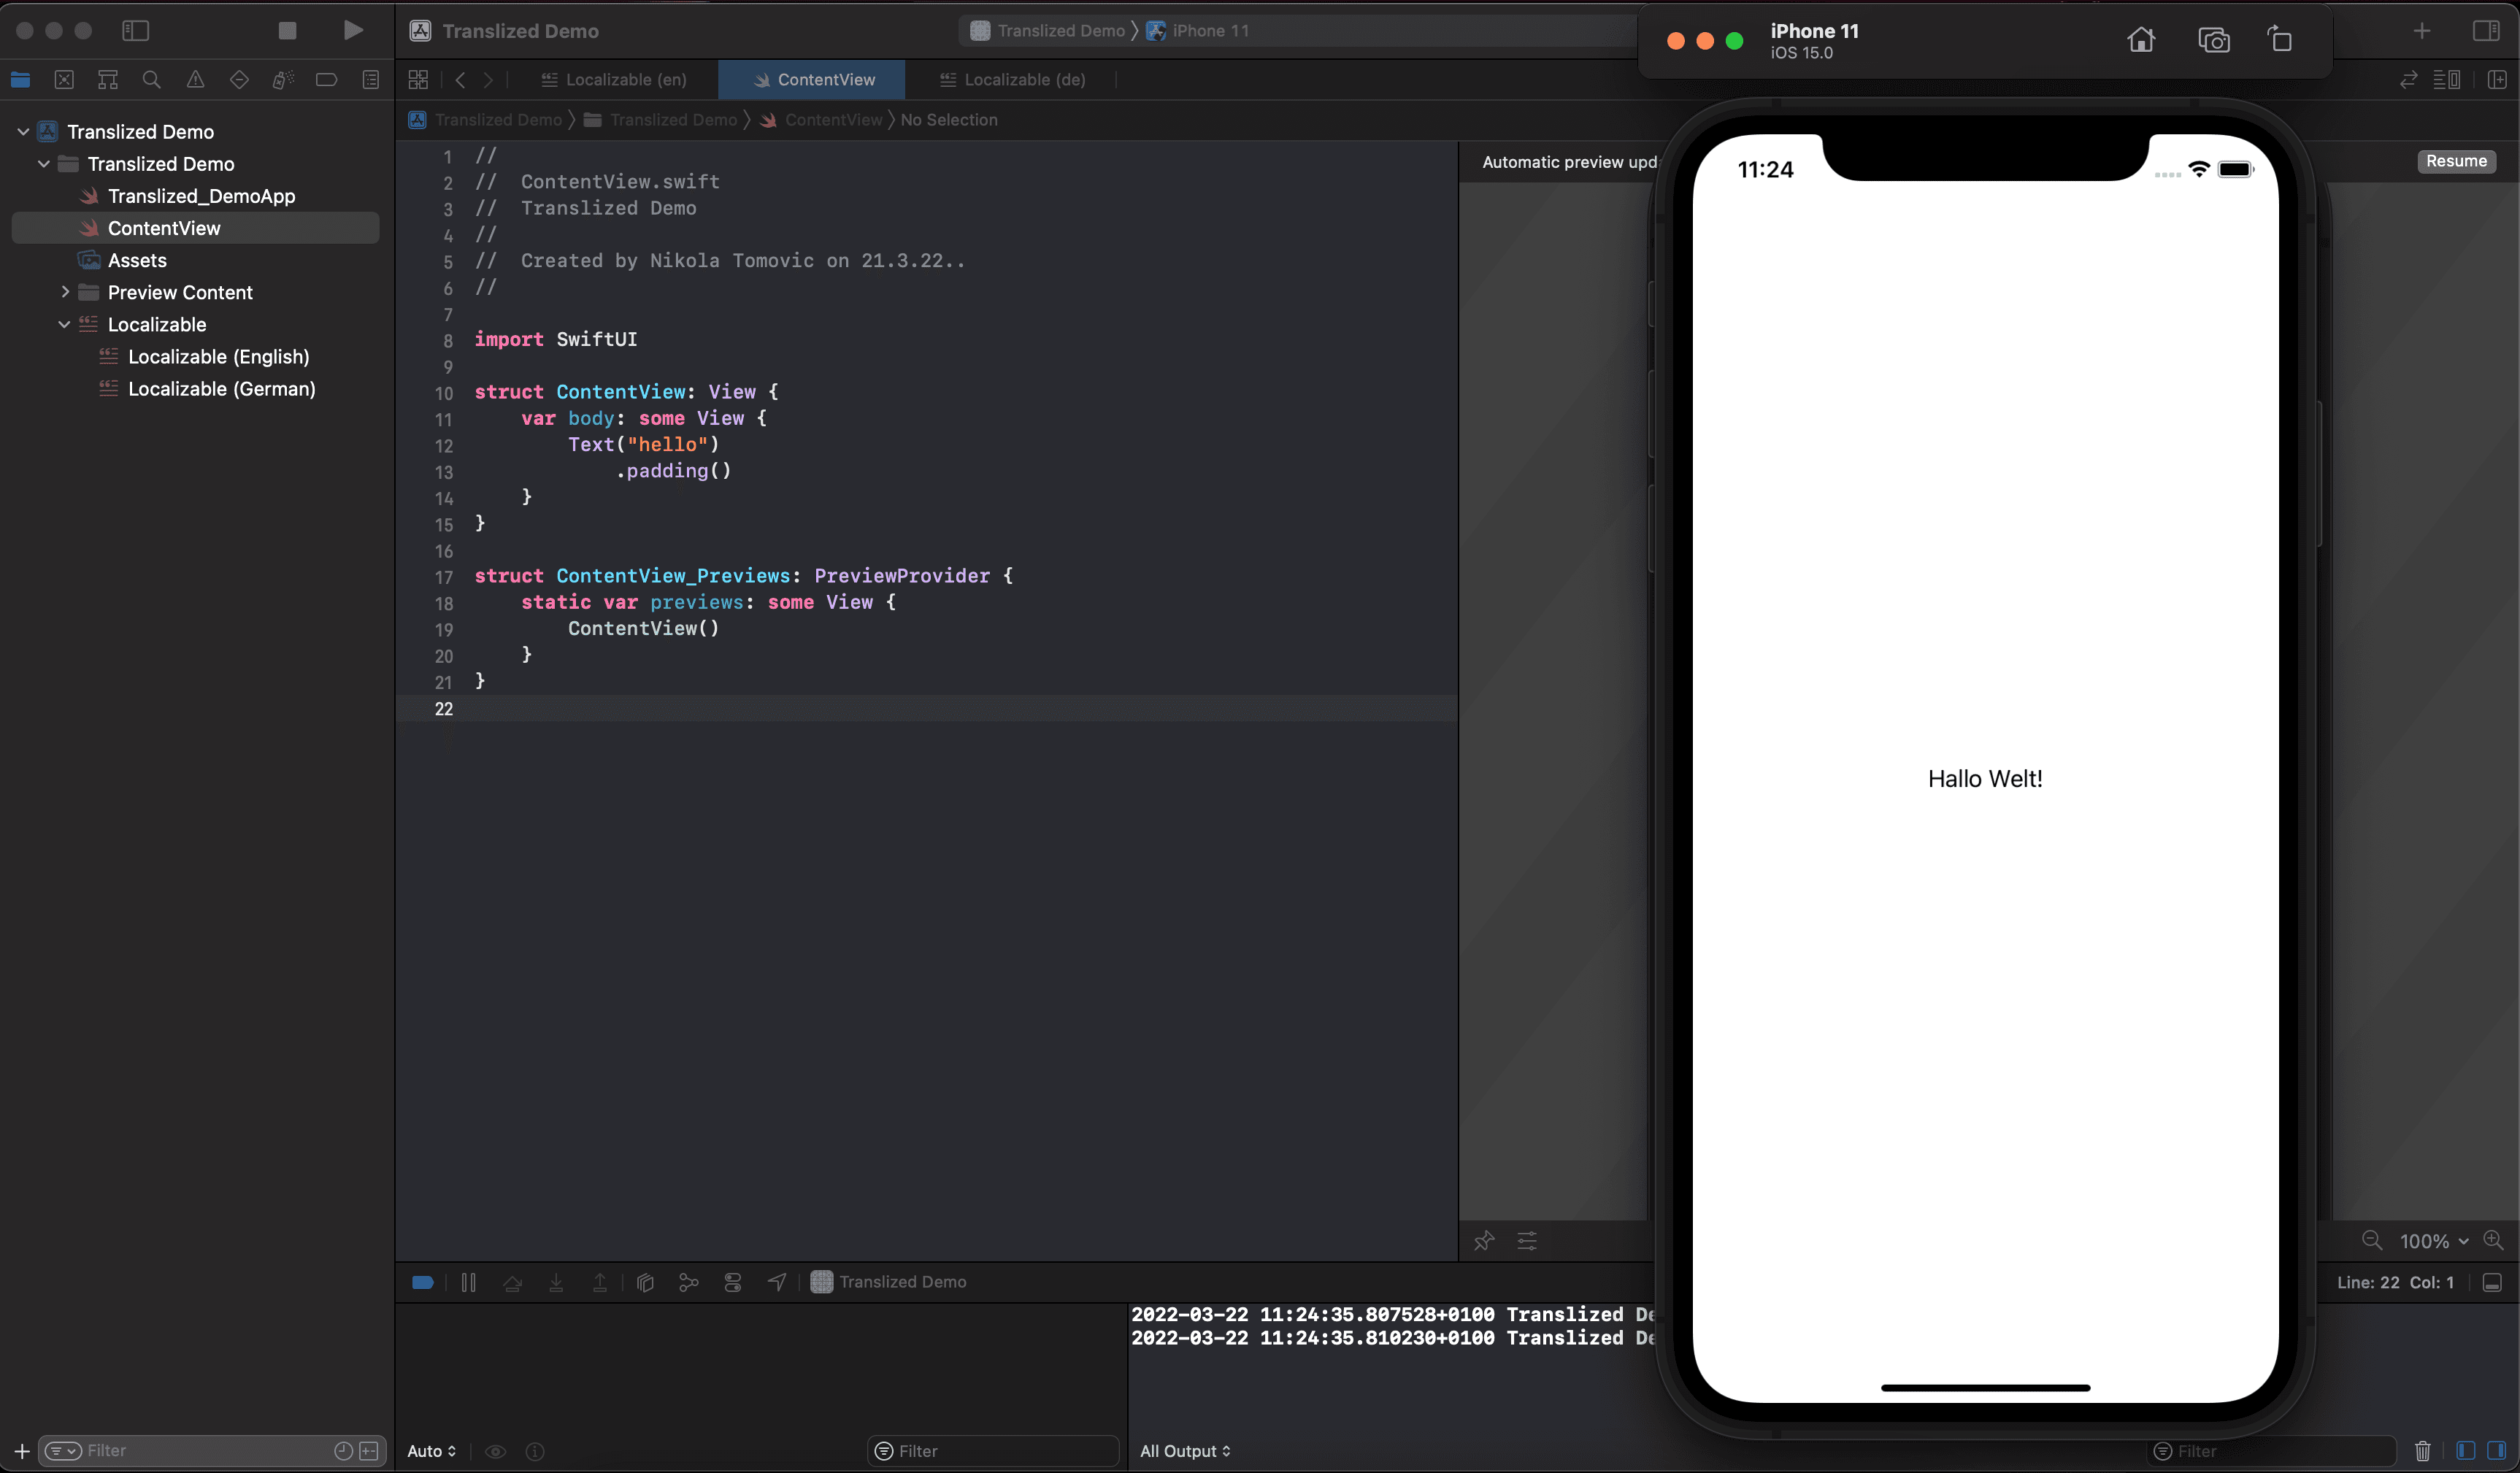
Now we see a German localized version!
Also now you should see German in Preview too.
SwiftUI Translated Previews
Sometimes it is useful to see all variants at once without running on a simulator or real device.
SwiftUI got your back for that too.
Replace struct ContentView_Previews in ContentView.swift with following.
struct ContentView_Previews: PreviewProvider {static var previews: some View {Group {// 1ContentView().environment(\.locale, .init(identifier: "en"))// 2ContentView().environment(\.locale, .init(identifier: "de"))}}}
Check your Preview tab, and click on the Resume button to refresh the canvas if no change is reflected:
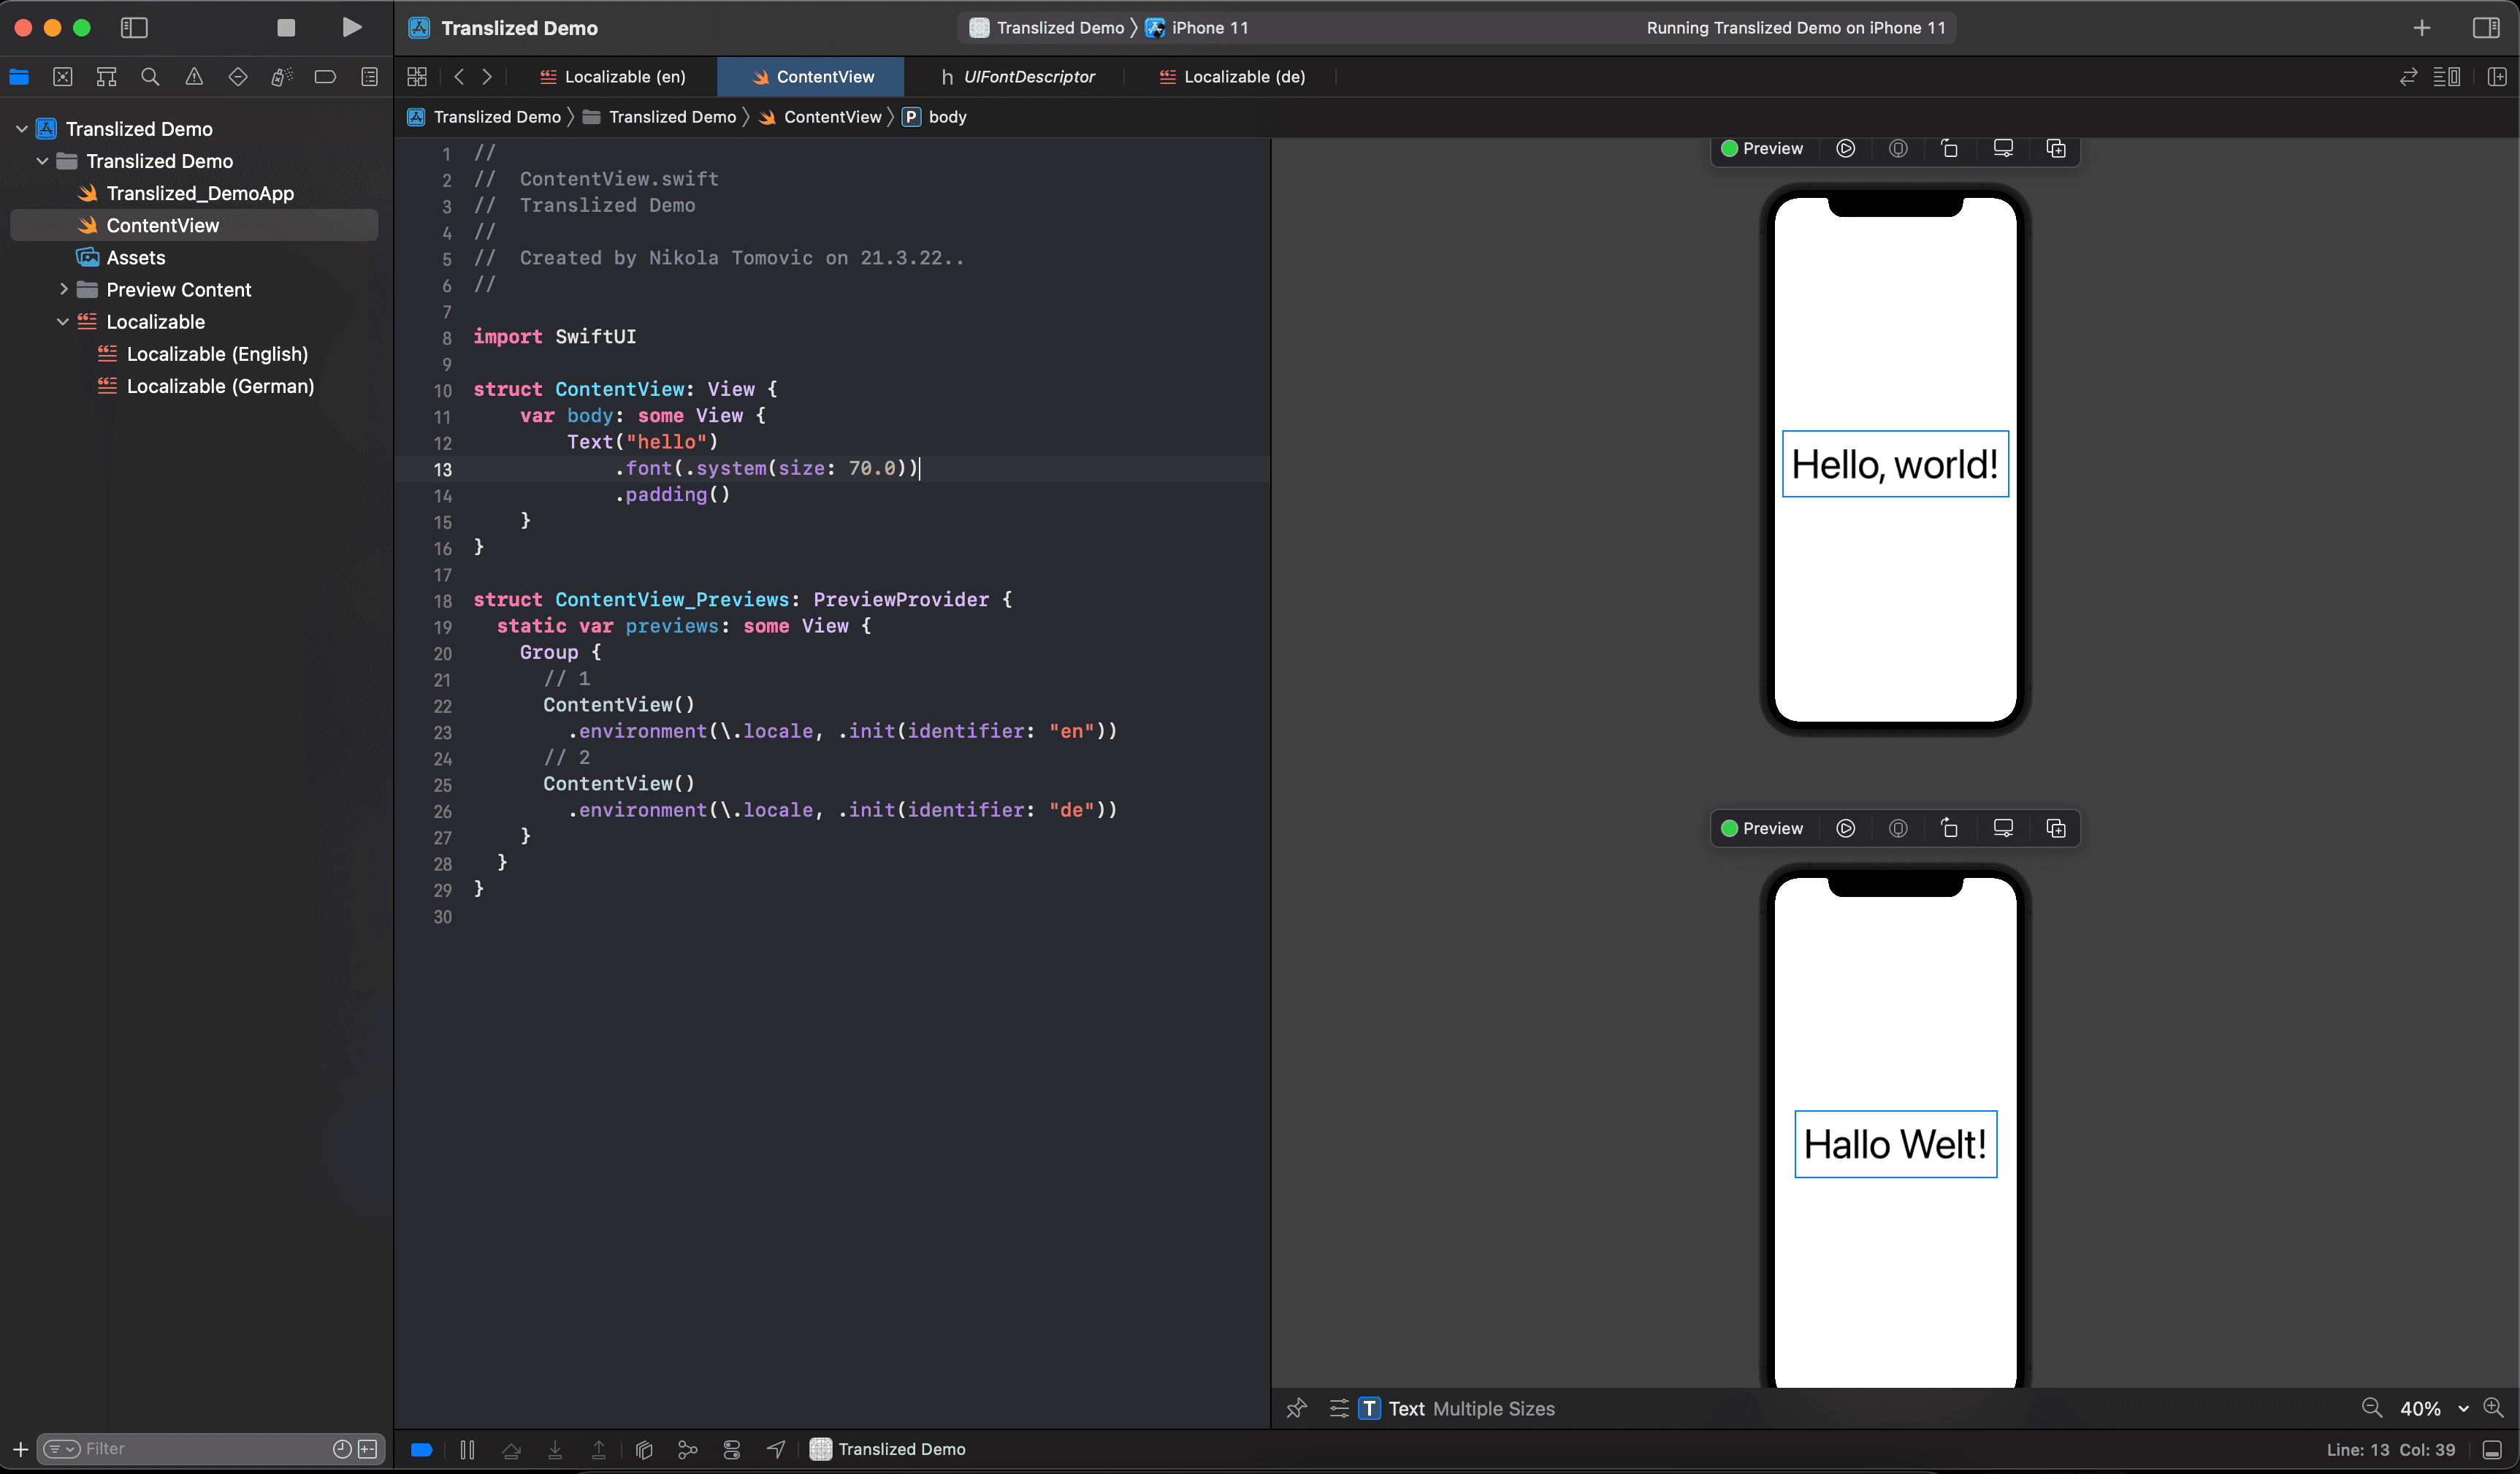
English and German Preview, side by side! Pretty awesome, right?
This is particularly helpful when you have many languages and regions you need to support and want to get a feel for their look on the UI.
Initializing Strings and Localized Markdowns
In previous examples, as we said, the string passed to Text is treated as an instance of LocalizedStringKey. In some use cases, you don't want to pass a String directly to the Text.
Let's add some translations for interpolated strings.
Add this line to the English file:
"welcome %@" = "Welcome %@";
And this one to the German file:
"welcome %@" = "Willkommen %@";
New to iOS 15 and Xcode 13 is method String(localized:table:bundle:locale:comment: .
let name = "Nikola"var welcomeMessage: String {String(localized: "welcome \(name)",comment: "Welcome message.")}
Now, that looks better than previous API: NSLocalizedString(_:tableName:bundle:value:comment:).
One more trick is to include markdown into translation.
Add this line to the English file:
"welcome_Translized" = "Welcome to __Translized__";
Add key into our ContentView Text. Build and run the app.
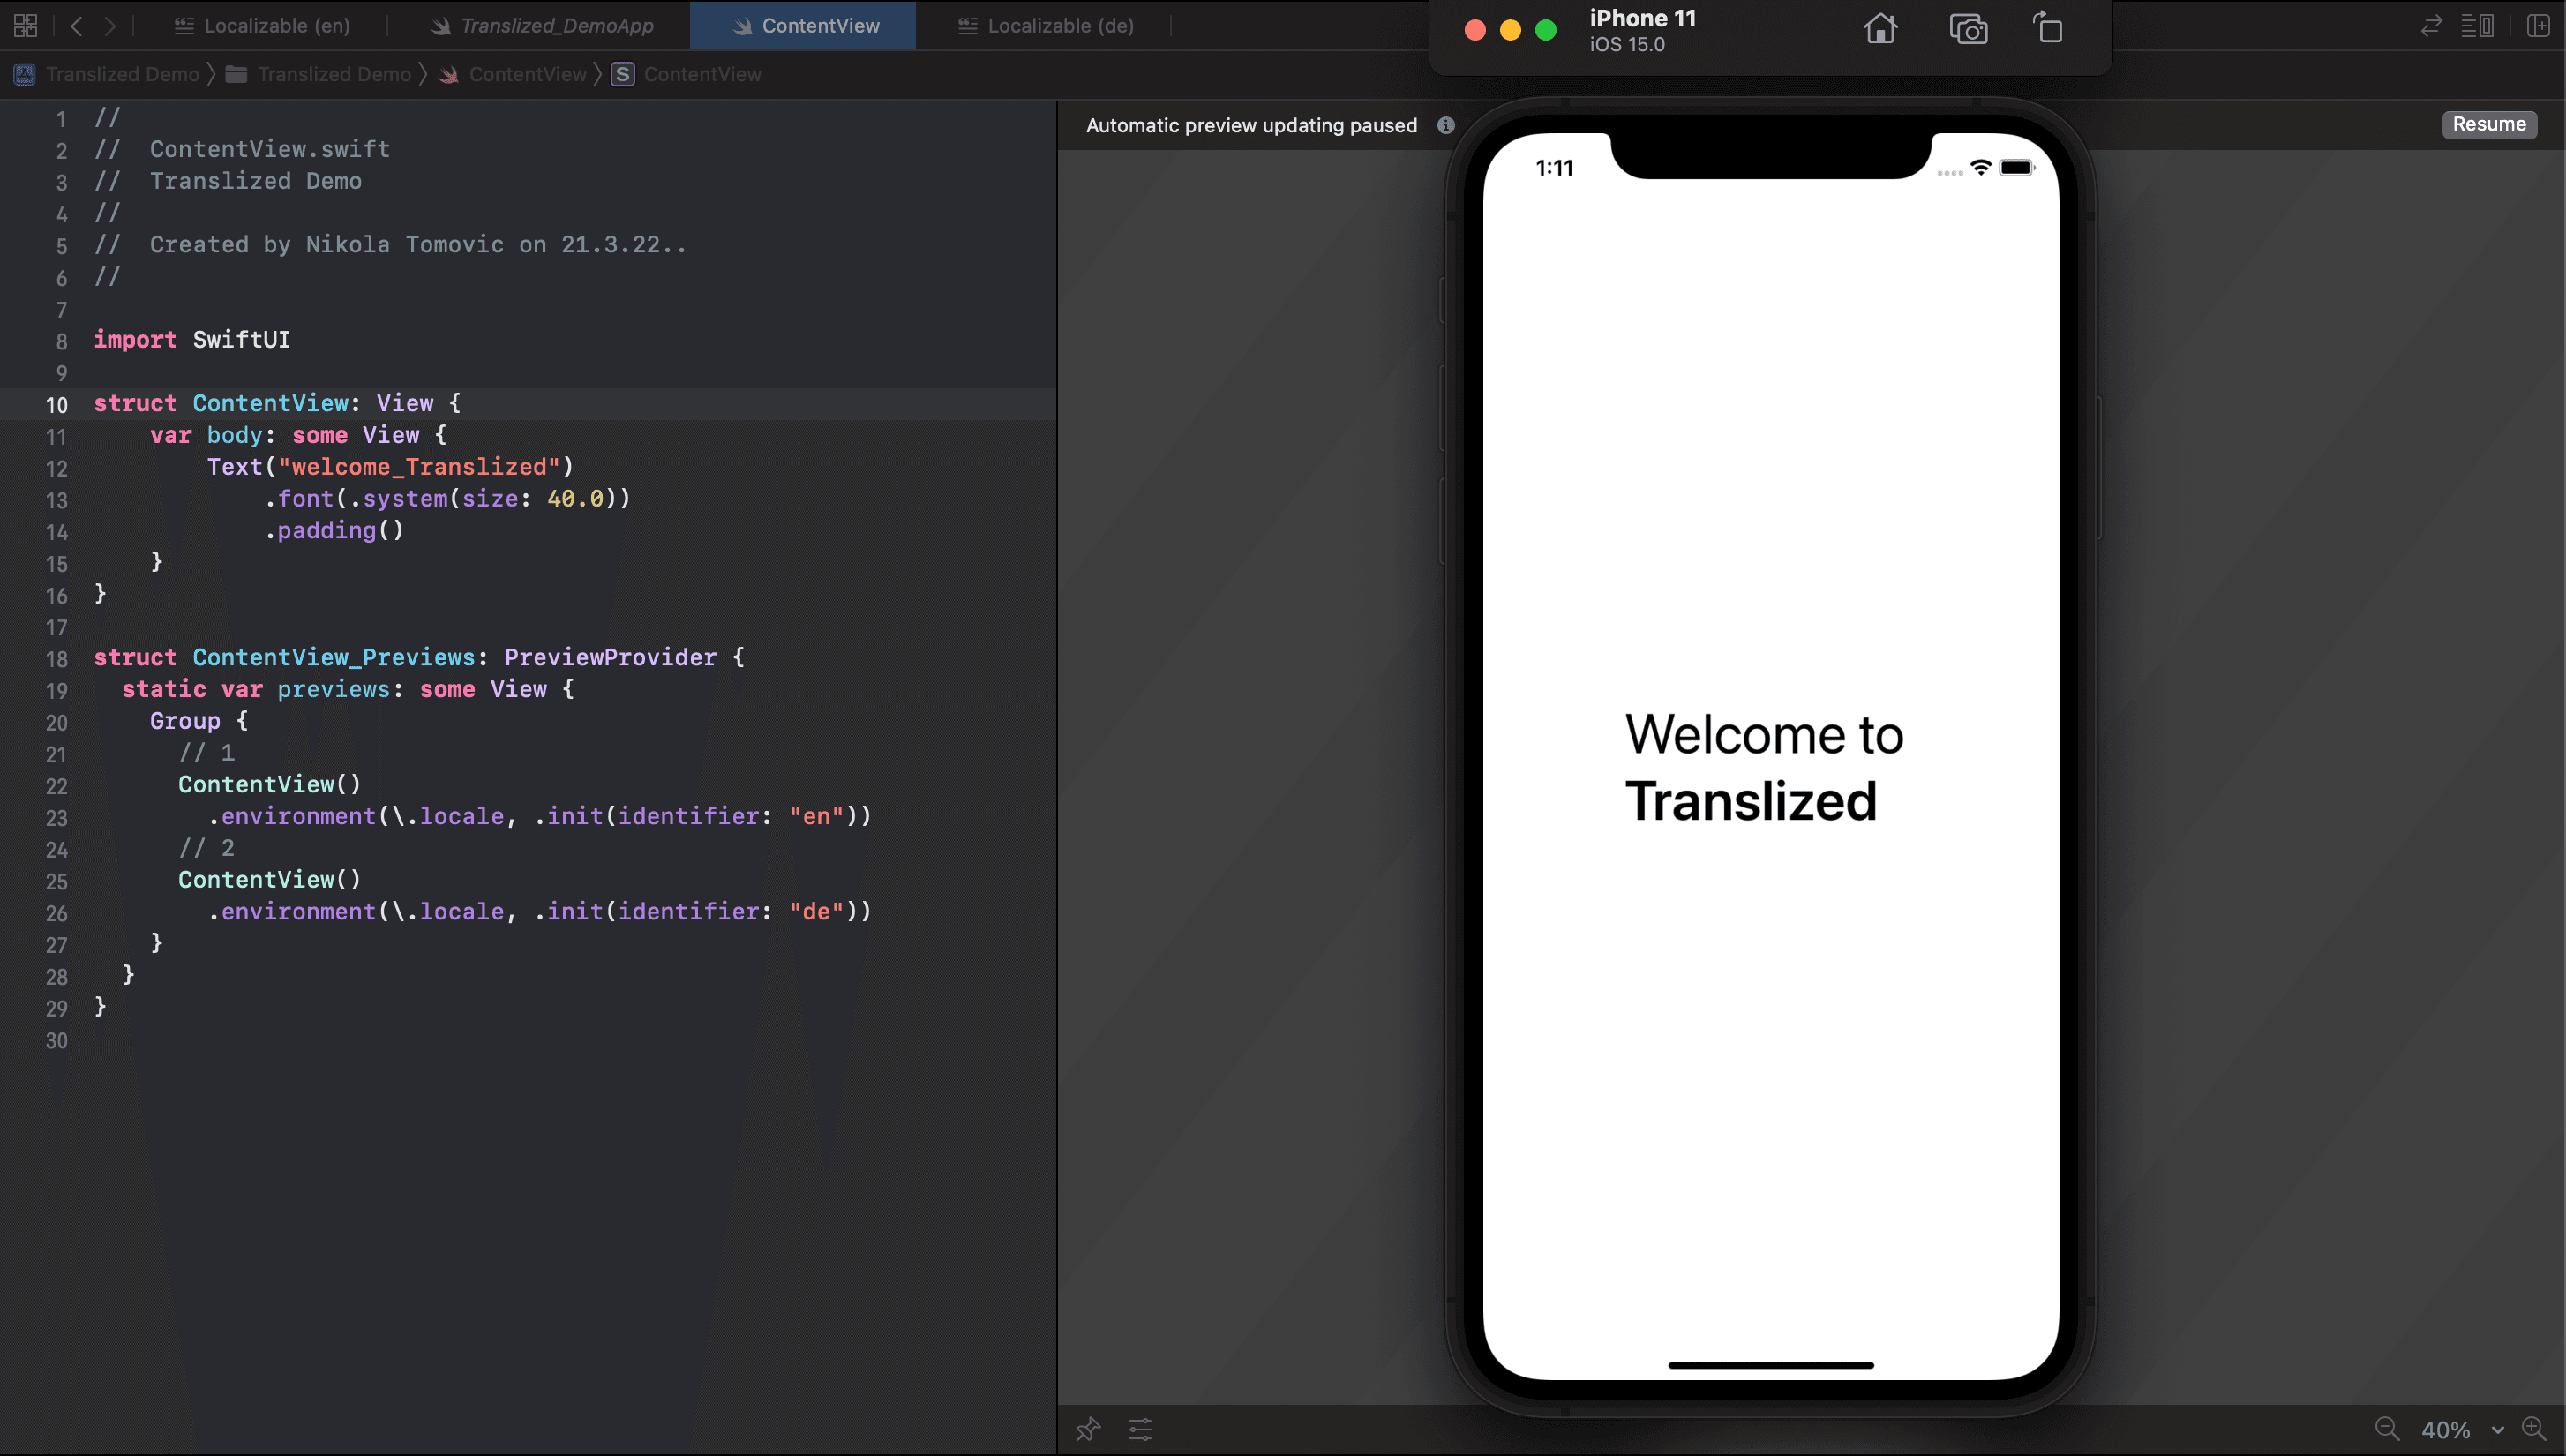
You can see that 'Translized' is now bold. You can use all perks of Markdown now directly in translations.
Plurals localization using Stringsdict
If/else block with multiple keys can solve your headaches for one language but for more bulletproof solution we are going to use .stringsdict file.
.stringsdict files allow us to define plural rules for the resource values of each language.
Start by creating Localizable.stringsdict file (File ▸ New ▸ File..).
After clicking on a new Localizable.stringsdict file you should see 'Localize...' button on the right side, just like when we created .strings. Click 'Localize...' button and in the dialog that appears, choose a language and click Localize.
We can select the other localizations in the inspector under Localization, and the .stringsdict
file becomes a group in the Project navigator that contains a version for each language.
Now we can add some pluralization rules!
Lets take a string like this: %d home(s) found.
We would like to show:
'No homes found' - when argument is 0
'One home found' - when argument is 1
'%d homes found' - when argument is 2 or more
A new .stringsdict file contains a dictionary with plural variants for a single formatted string. The template gives us a good starting point.
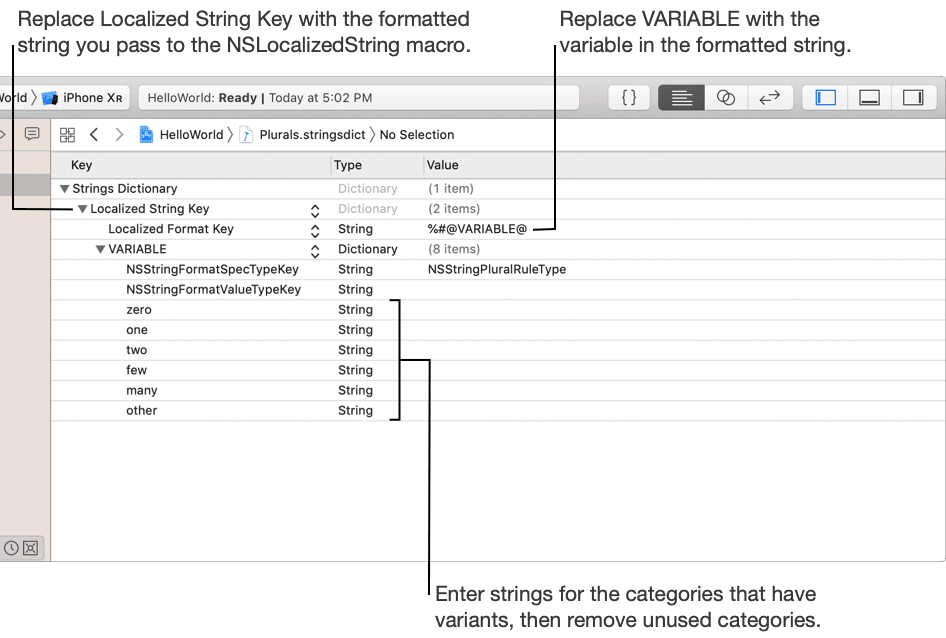
For each formatted string in your app that contains a numeric value, enter the formatted string as the key and a plural variant dictionary as the value with the following key-value pairs:
Localized Format Key - A formatted string that contains variables. To replace the string with a plural rule, we will precede the variable with the %#@ characters and follow it by the @ character. In our case we will put %#@homes@ for a value.
VARIABLE - A dictionary that specifies the plural variants for a variable in the formatted string.
Lets add some plural rules for our example now. You can open the .stringsdict file as a source code (right click on Localizable.stringsdict ▸ Open as ▸ Source code ) and replace the content with the following:
<?xml version="1.0" encoding="UTF-8"?><!DOCTYPE plist PUBLIC "-//Apple//DTD PLIST 1.0//EN" "http://www.apple.com/DTDs/PropertyList-1.0.dtd"><plist version="1.0"><dict><key>homes_found %lld</key><dict><key>NSStringLocalizedFormatKey</key><string>%#@homes@</string><key>homes</key><dict><key>NSStringFormatSpecTypeKey</key><string>NSStringPluralRuleType</string><key>NSStringFormatValueTypeKey</key><string>lld</string><key>zero</key><string>No homes found</string><key>one</key><string>One home found</string><key>other</key><string>%d homes found</string></dict></dict></dict></plist>
If we open it again as a .plist file we will see this.
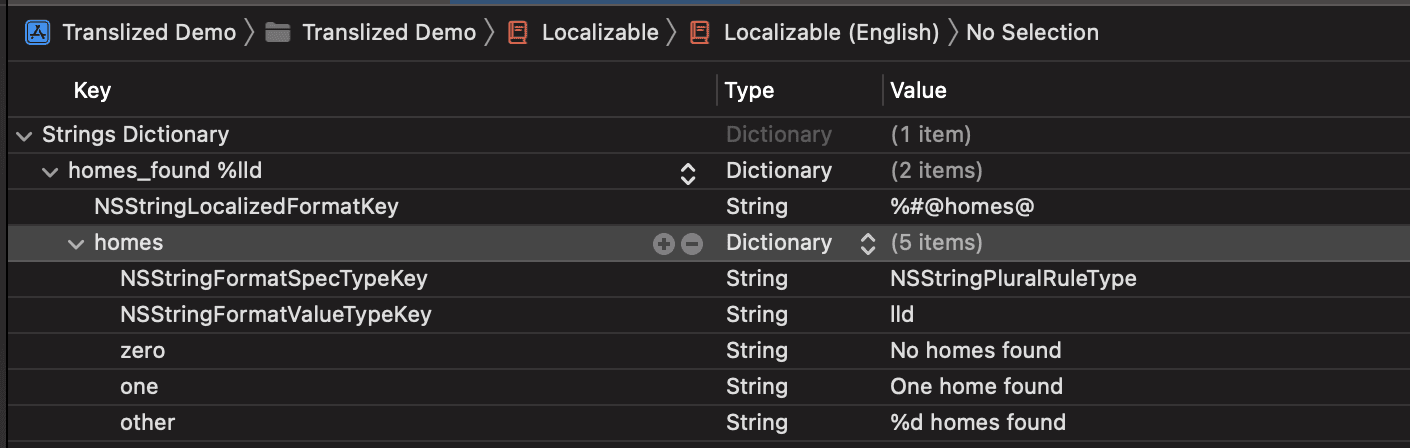
We defined:
key: homes_found %lld
NSStringLocalizedFormatKey: %#@homes@ (This is the actual format of translation. We could add some prefix or suffix if we wanted to have whole sentence with plurals in the middle. For example: We found %#@homes@ in the London.)
NSStringFormatValueTypeKey: lld (integer value)
Rules for: zero, one, other (also available: two, few, many)
💡 Important: use %lld instead of %d for integers in the .stringsdict file.
Now, lets test our pluralization rules. Replace your ContentView body with:
struct ContentView: View {let homes = 0var body: some View {Text("homes_found \(homes)").font(.system(size: 40.0)).padding()}}
Build and run the app.
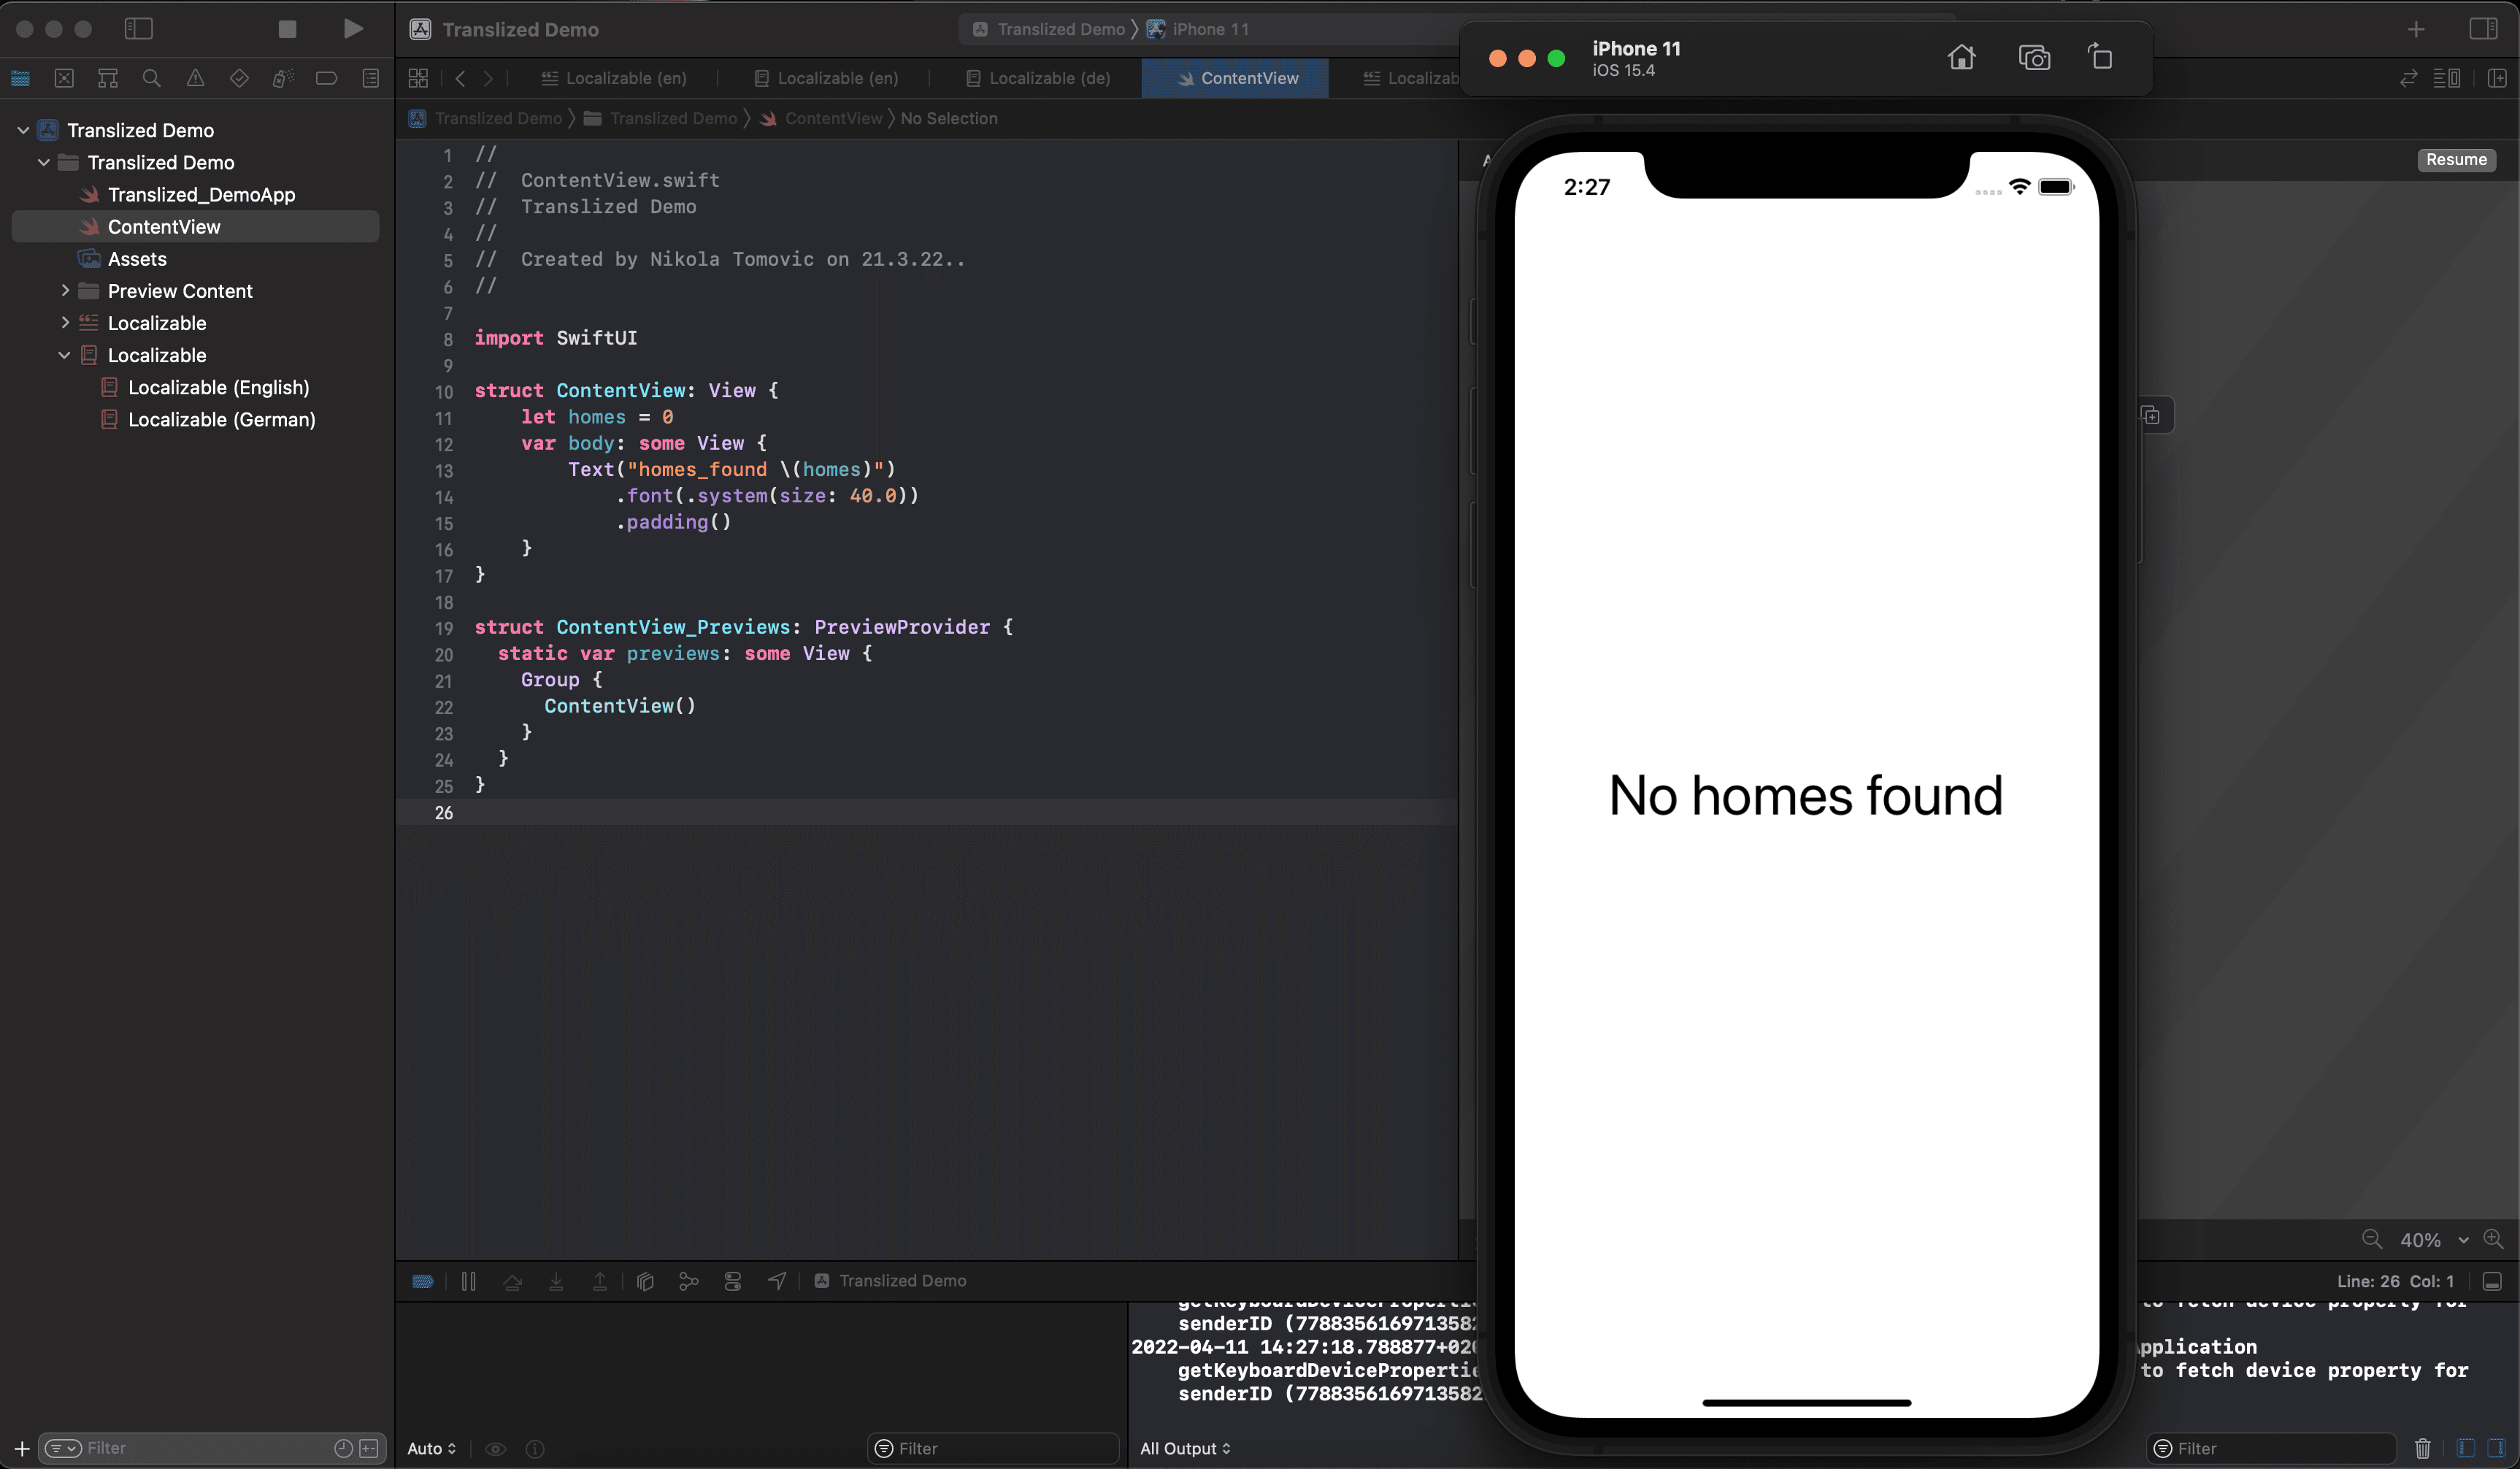
That's it! We successfully added plural rules to our app. You can now play around and change homes constant to 1,2 or higher and test our pluralization rules!
Import and Export Localization
Importing and exporting are really easy with Xcode 13.
Go to Product ▸ Export Localizations.. for export.
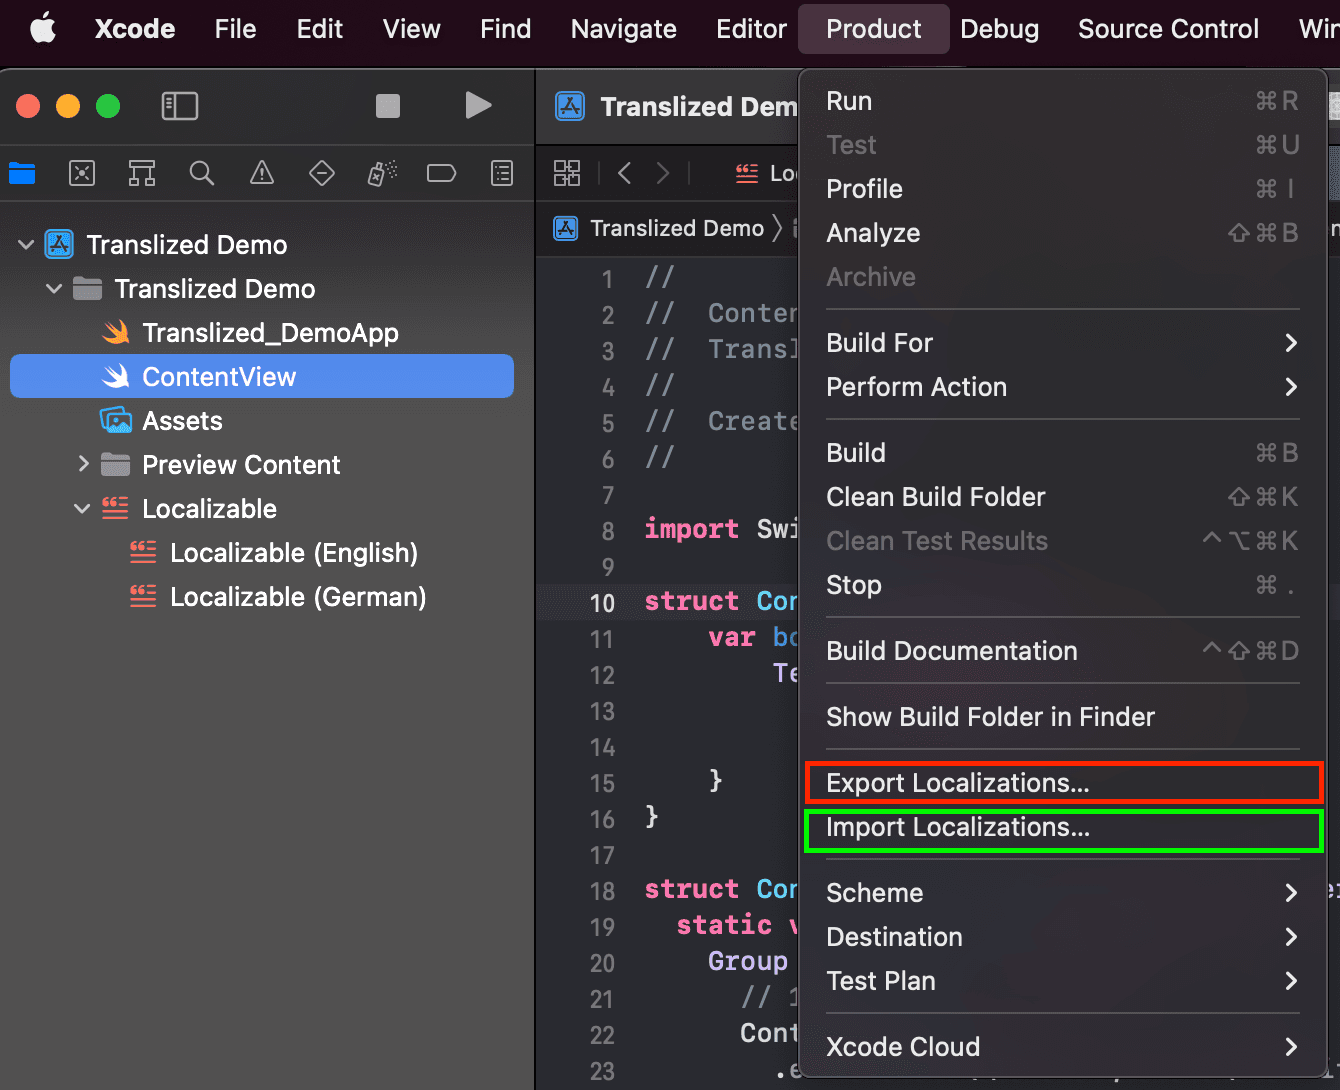
Xcode creates an Xcode Localization Catalog folder (with .xcloc extension) for each of the languages. Each of these folders contains the resources and assets you marked localizable. You can then send the catalog folder to your localizers to start work immediately.
When finished just import it back and you successfully localized your app into a new language!
Final thoughts about SwiftUI Localization
SwiftUI is an awesome and a very promising framework. It is, without a doubt, the future of iOS UI building. However, it may need some time until it reaches the same reliability and robustness as UIKit.
When it comes to localization, SwiftUI is really helpful, but still, there are a lot of manual tasks which can be automated.
Some of the pain points of manual localization are:
Copy-pasting from spreadsheets is a painful, error-prone, and slow process
You have no centralized platform to work from
Collaboration is not so easy
You can't automate localization process with spreadsheets
Translized is a localization platform that can help you with that and do all the heavy lifting.
Some of the benefits you can expect from using a localization platform are:
Saving engineering hours
Ensuring translations quality
Easy collaboration
Reaching new markets faster
Sign up for a 7-day free trial and check it yourself!